
I have come across various requirements from clients where it was more feasible to go with creating the C# console application for bulk processing the records in D365 CRM based on complex scenarios like updating the closed case entity records or uploading the files to SharePoint at specific location, or any scenarios that needed custom implementation. We also have different approaches to connect to the Dynamics 365 CRM or SharePoint using C# code to perform specific tasks. We can also create the Azure Service App (WebApi) or Window Form Application to perform aforesaid tasks.
Typically, developers connect with the D365 CRM or SharePoint using the Username and Password of the licensed user where these credentials will be stored into the App.Config file of the C# console application. But this approach has below cons that are to be addressed:
To overcome the aforesaid points and in order to choose the appropriate approach, we can make use of the ClientId and ClientSecret instead of the Username and Password. Also, we can make use of Application User that does not require any licences (it’s free).
Follow the below steps to connect to the D365 CRM or SharePoint using C# Code.
Connection to D365 CRM:
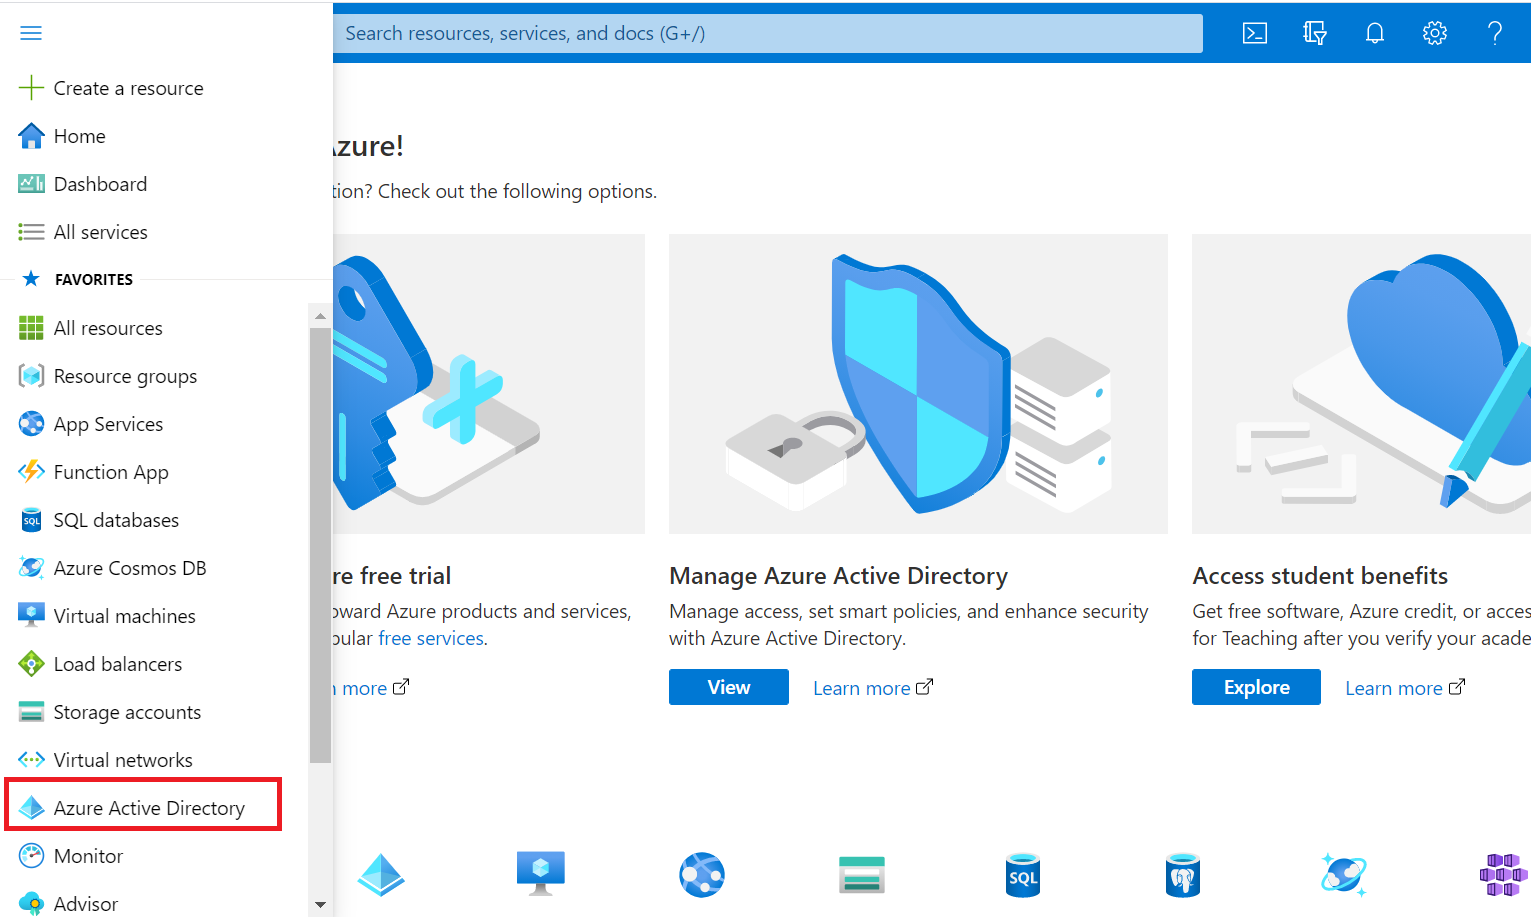
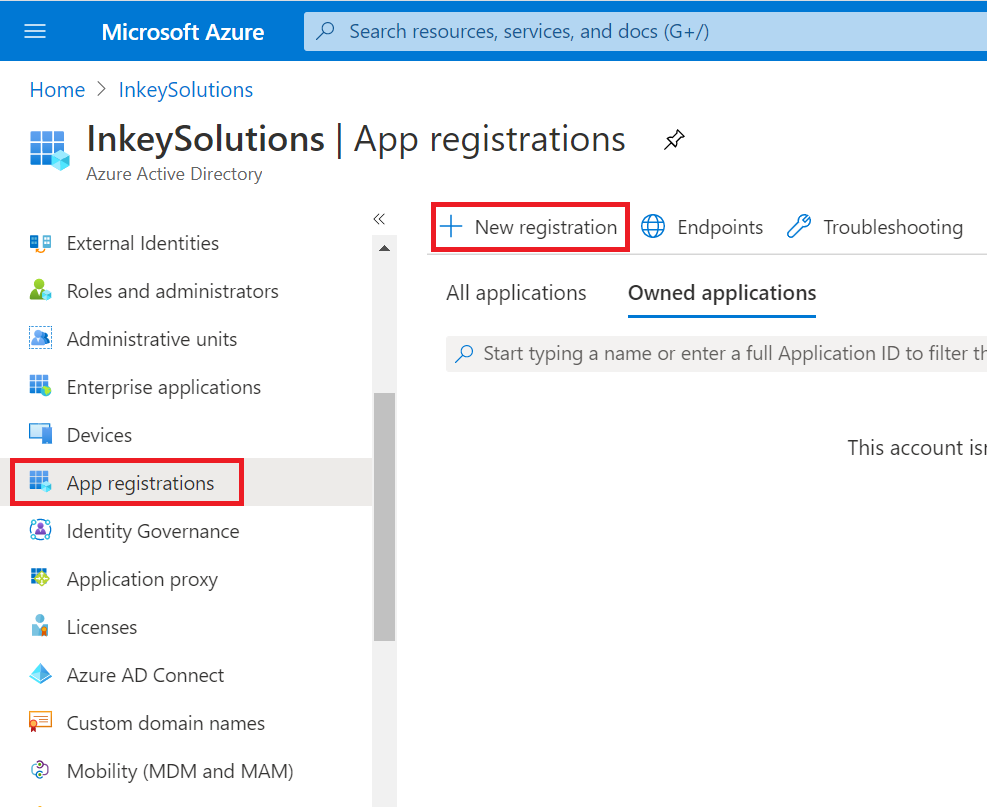
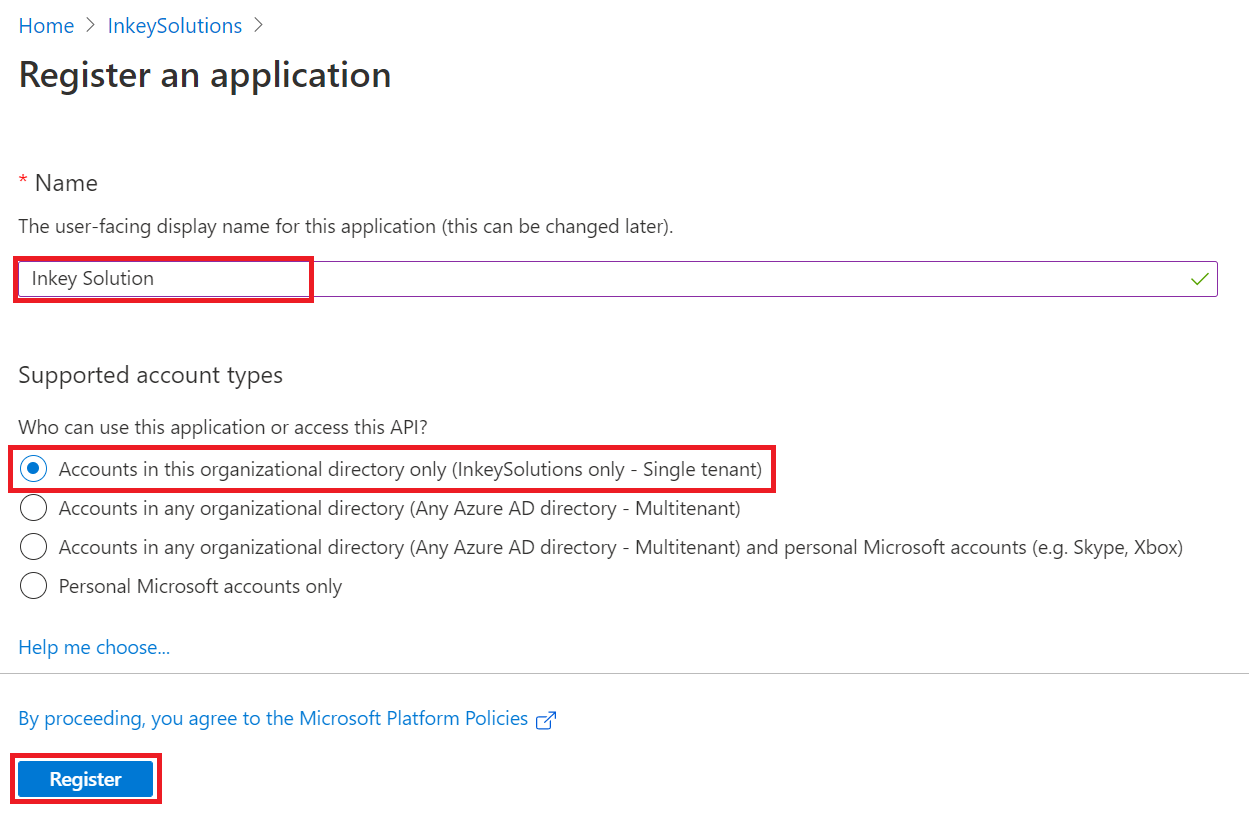
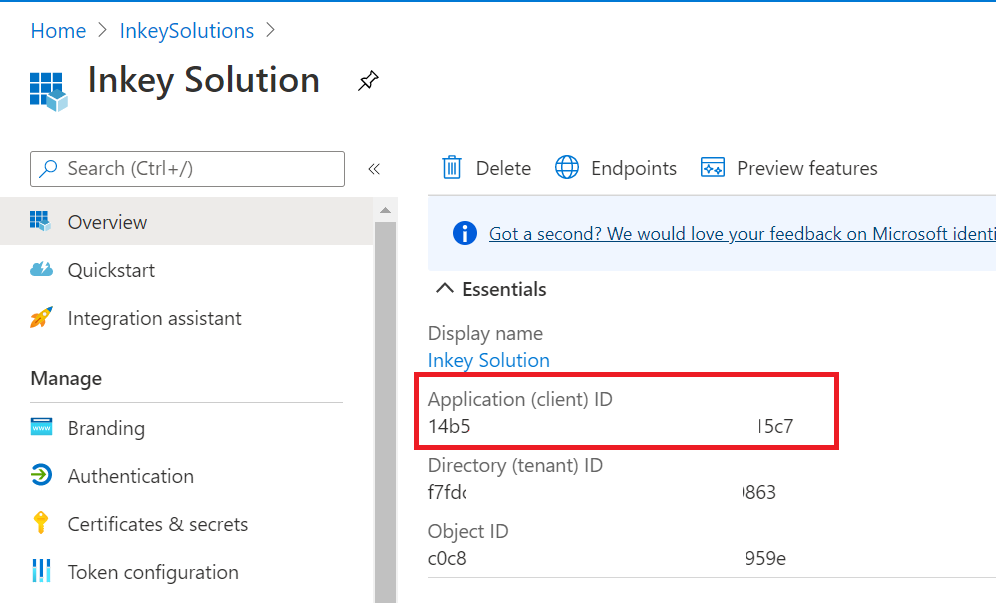
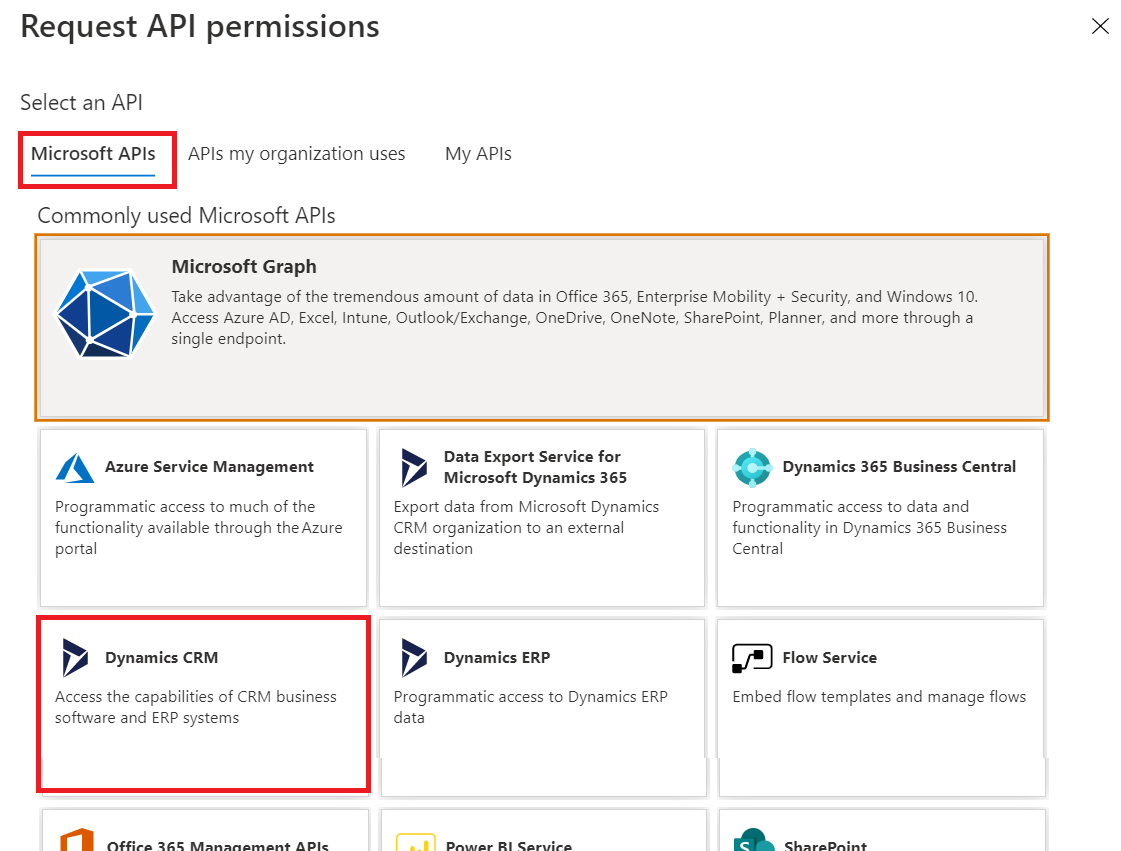
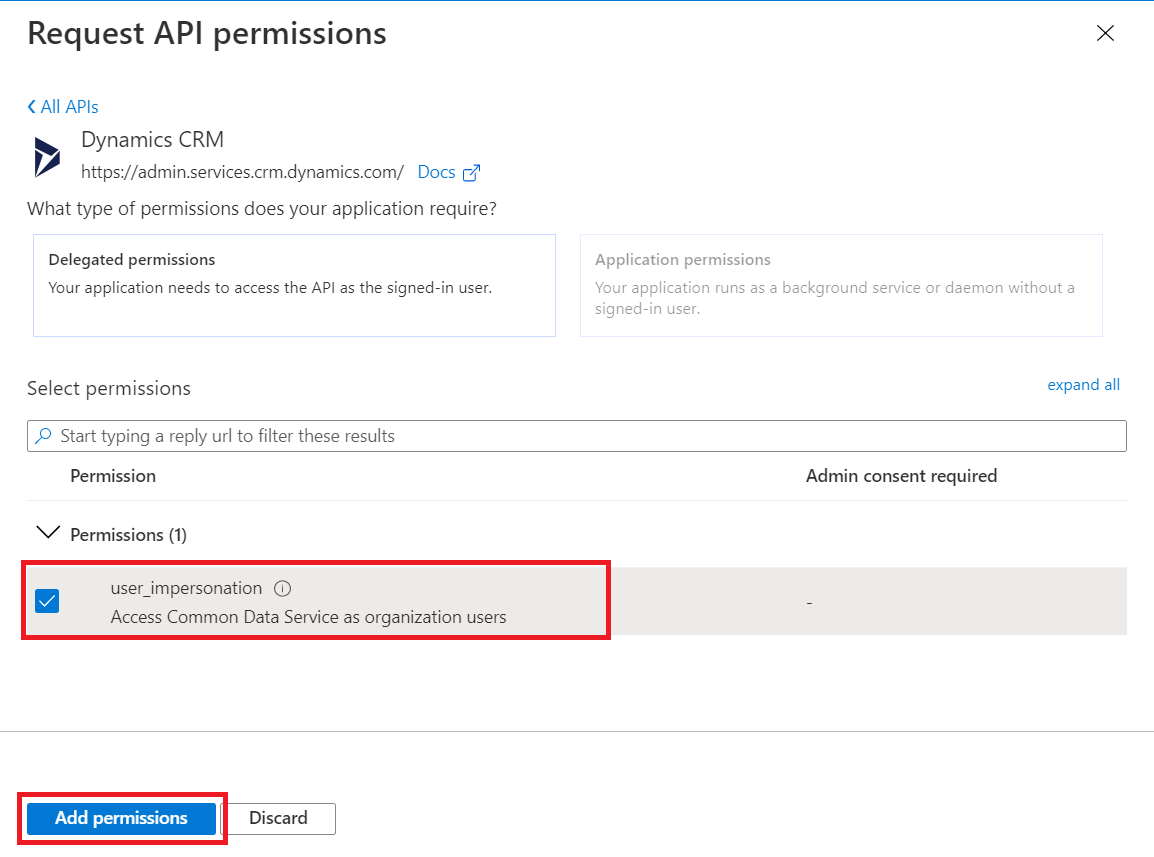
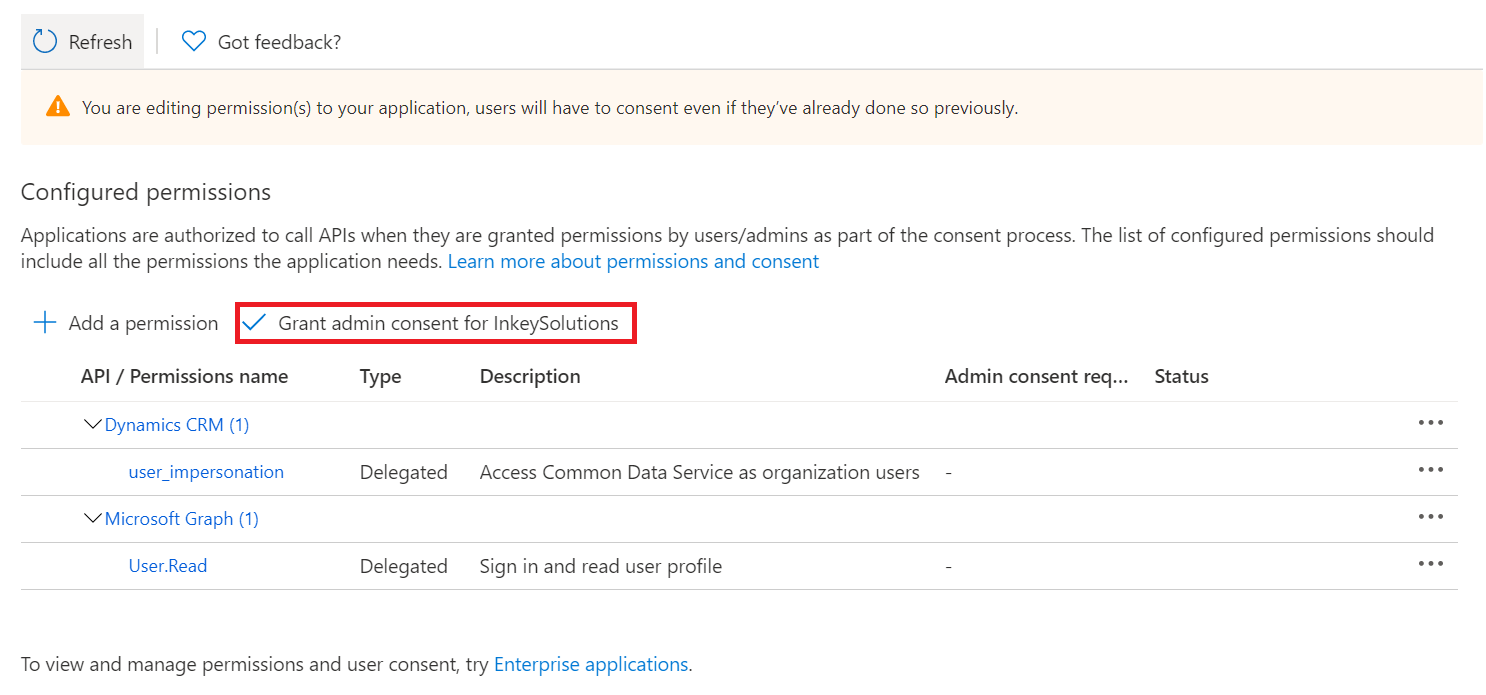
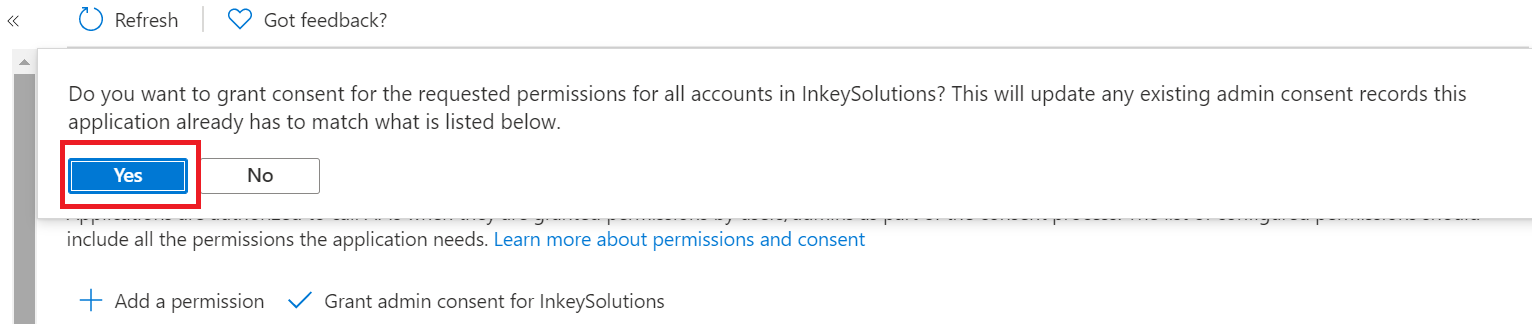
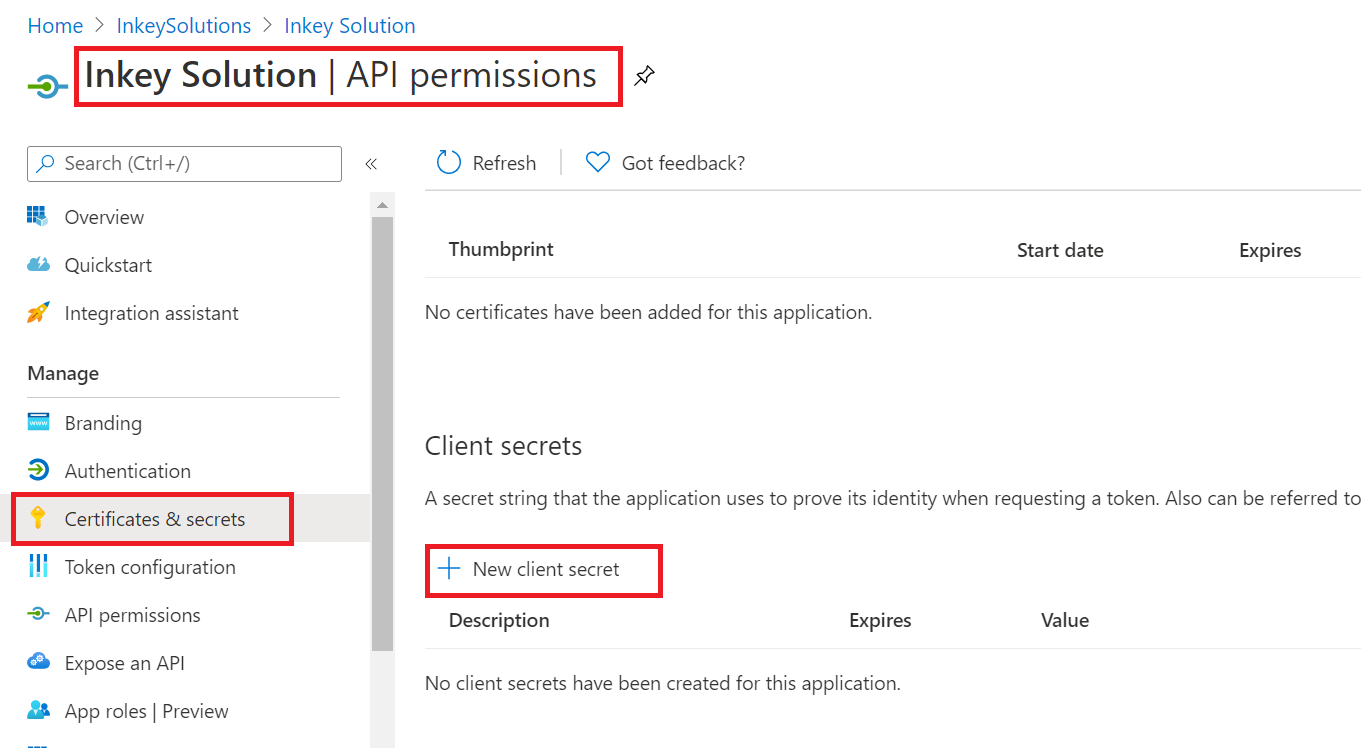
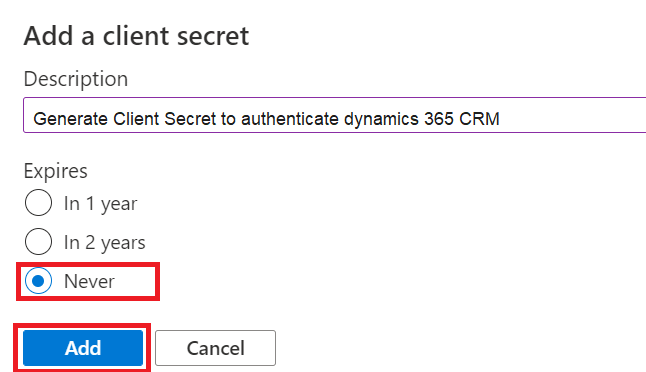
Generate ClientId and ClientSecret at Azure:
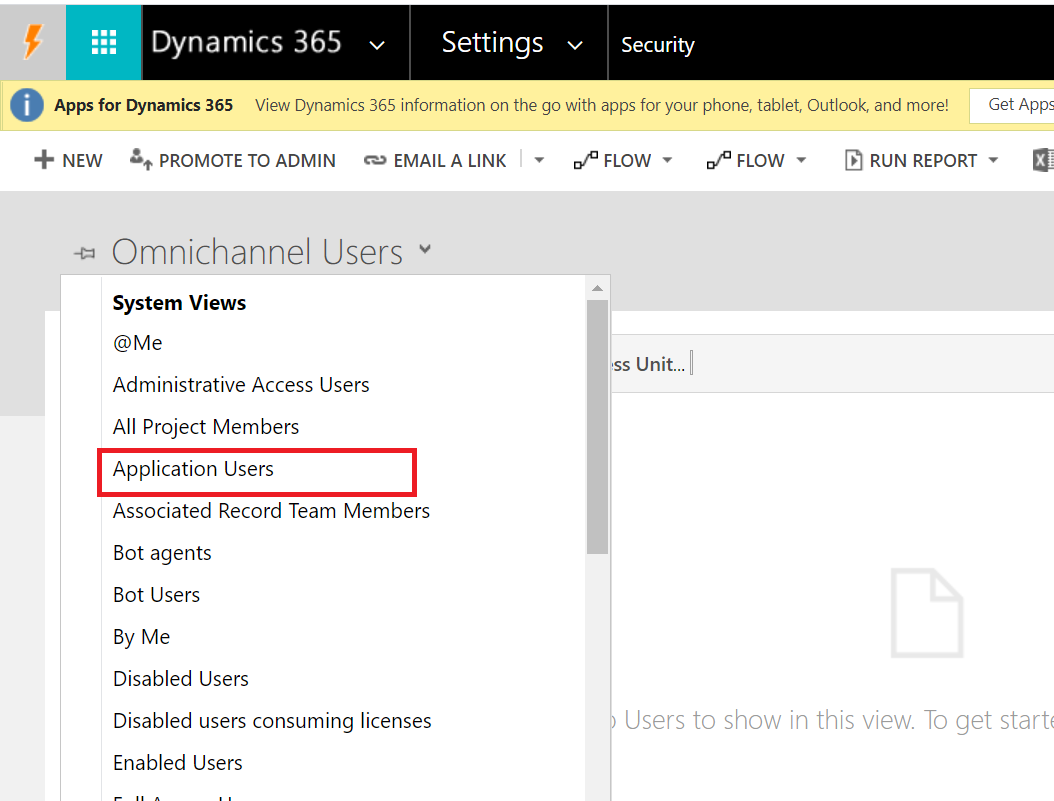
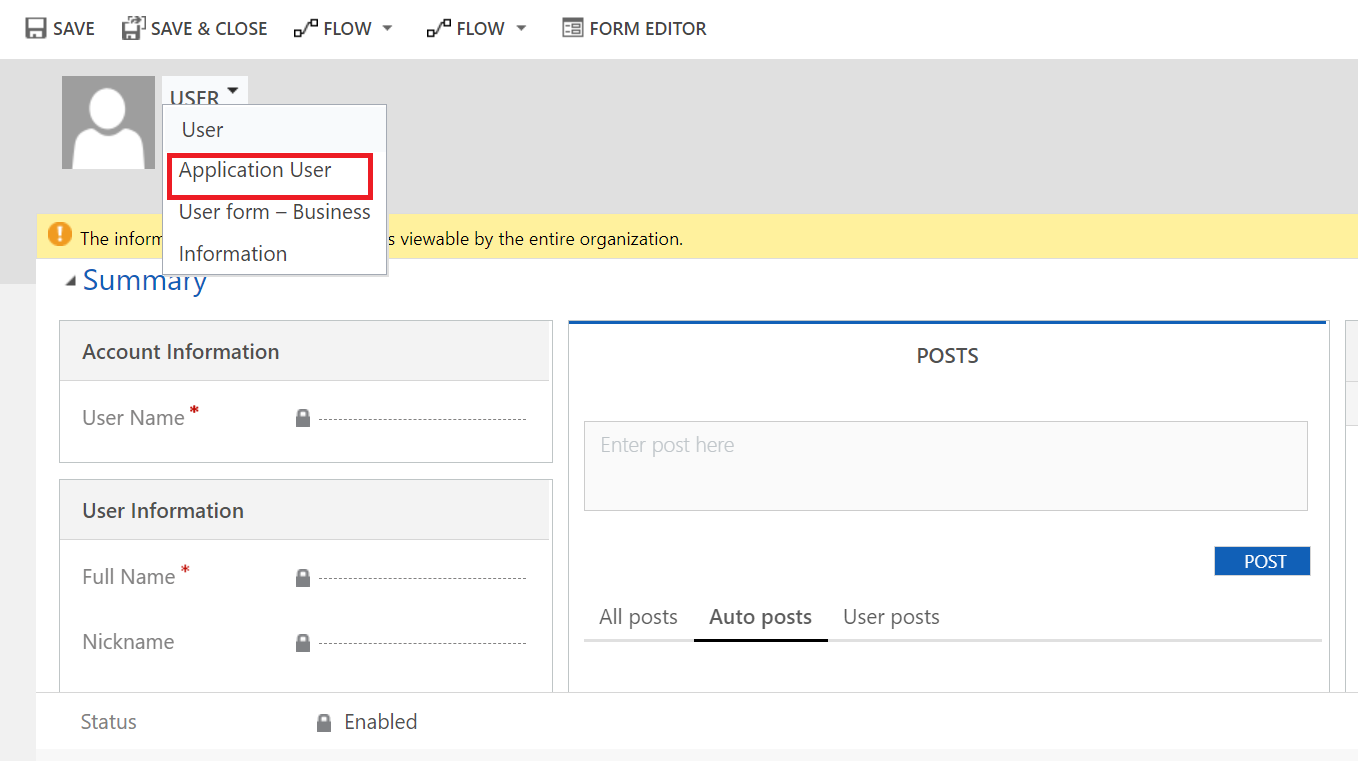
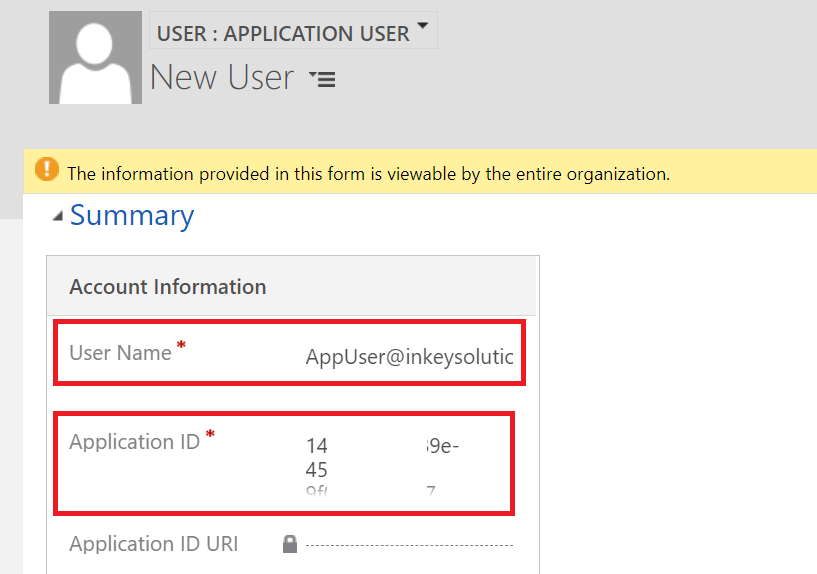
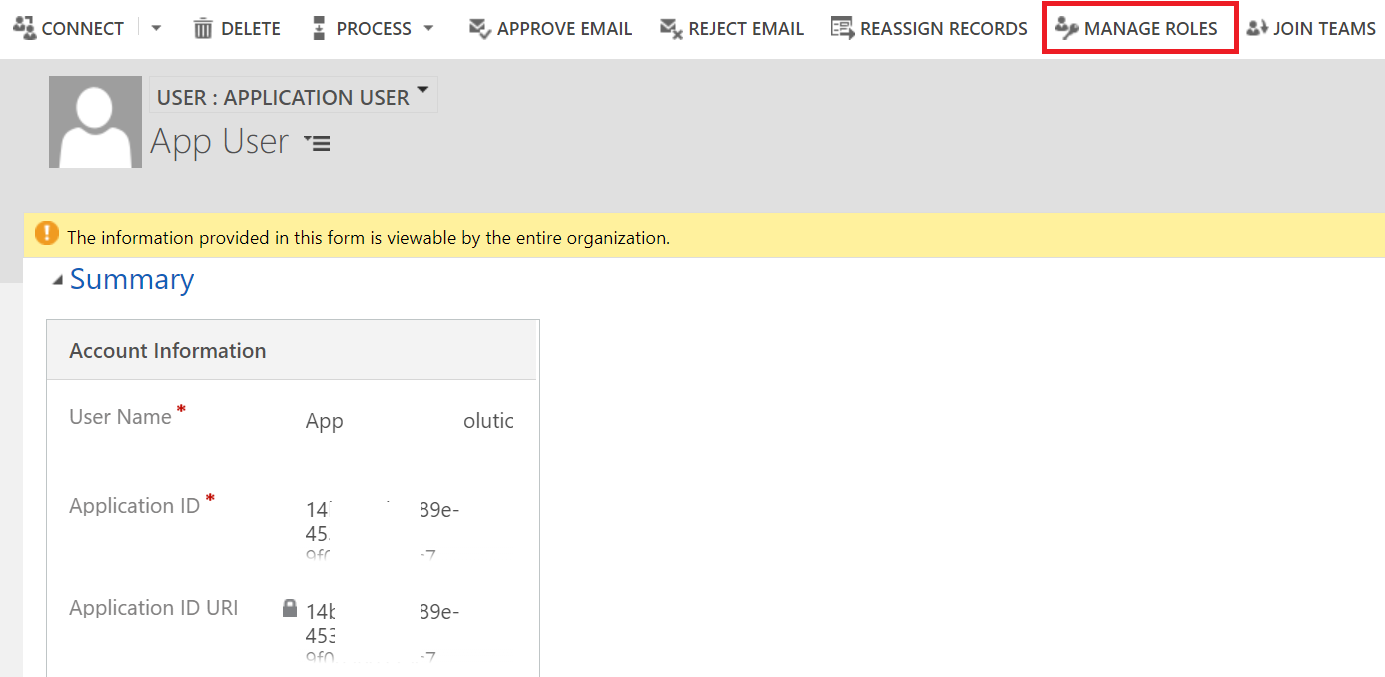
Create Application User in D365 CRM:
In the next blog here we will take up the task of writing the code to connect using what we have done so far. See you next week.
ATM Inspection PowerApp to ease ATM inspection and report generation process.
https://powerapps.microsoft.com/en-us/partner-showcase/inkey-solutions-atm-inspection/
Insert data into Many-to-Many relationship in Dynamics CRM very easily & quickly, using the Drag and drop listbox.
http://www.inkeysolutions.com/what-we-do/dynamicscrmaddons/drag-and-drop-listbox
Comply your Lead, Contact, and User entities of D365 CRM with GDPR compliance using the GDPR add-on.
https://www.inkeysolutions.com/microsoft-dynamics-365/dynamicscrmaddons/gdpr
Create a personal / system view in Dynamics CRM with all the fields on the form/s which you select for a particular entity using the View Creator.
http://www.inkeysolutions.com/what-we-do/dynamicscrmaddons/view-creator
INKEY is your solution partner.
Our focus is to deliver you in-time intelligent innovative solutions ("key") for the problems in hand. Maintaining a quality standard right from the inception of a project is our top most priority.
Our team of talented professionals will execute your projects with dedication and excellence. We take ownership and accountability for the effort that goes into meeting our client’s needs.
Years of experience and proven success of delivering innovative custom solutions.


© All Rights Reserved. Inkey IT Solutions Pvt. Ltd. 2024


[…] our previous post, we saw what needs to be done in Azure and Dynamics 365. Now we will see the code […]
[…] our previous blog posts for using clientid/client secret part1 and part2, we used a Nuget package that has been deprecated. The rest of the parts of the blogs […]