Today in this blog, I will explain you how to setup various resources in Azure to integrate the external website with dynamic crm 365 using Azure Logic App and Service Bus.
You will have to create below resources in Azure to integrate external website with Microsoft Dynamics 365:-
1. Resource group
2. Service Bus Namespace & Topic
3. Logic App
4. App Service
1. Resource group
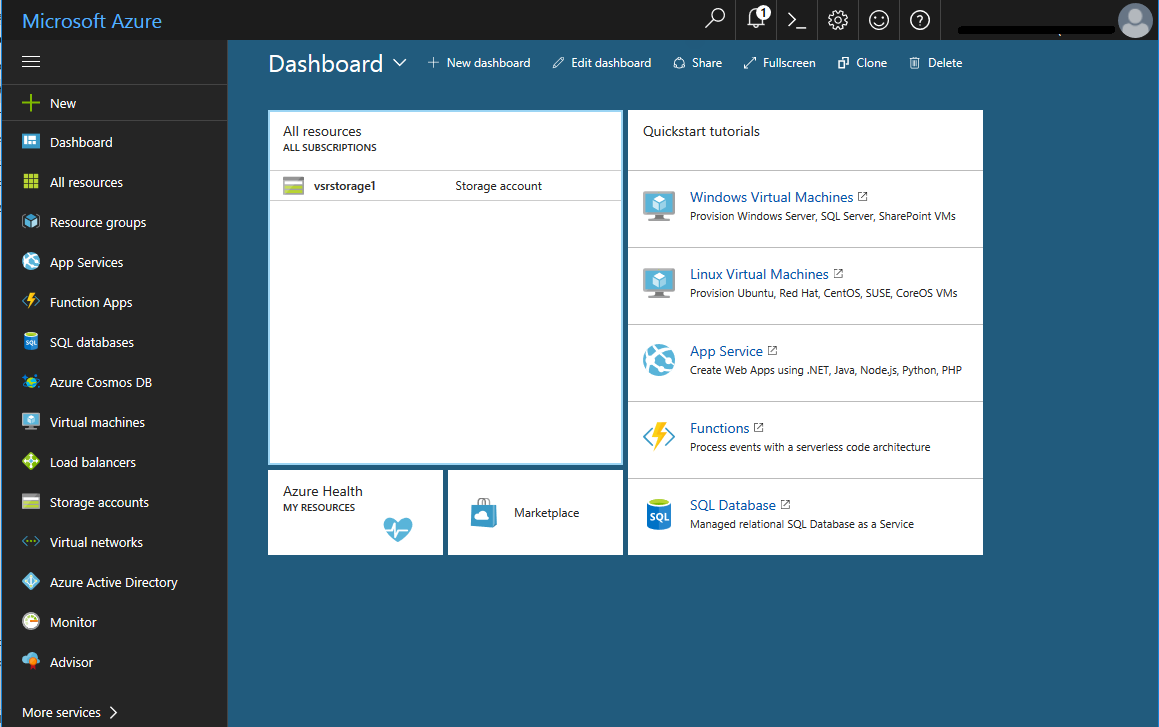
Resource group is used to collect and manage all your application resources. It groups a set of resources together. Items that you create will need to belong to a resource group but an item can only belong to a single resource group at a time. Resources can be moved from one resource group to another. Now, lets see how to create resource group:-
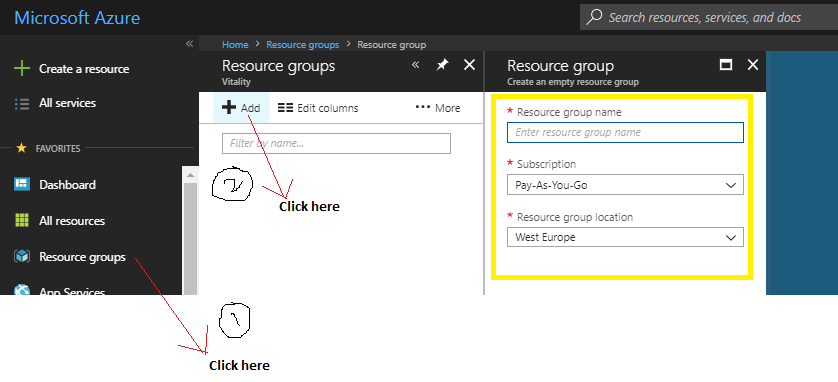
Resource group name: Enter a unique name for your new resource group.
Subscription: Select your Microsoft Azure subscription.
Resource group location: Select the location that is closest to your physical location.
2. Service Bus Namespace & Topic
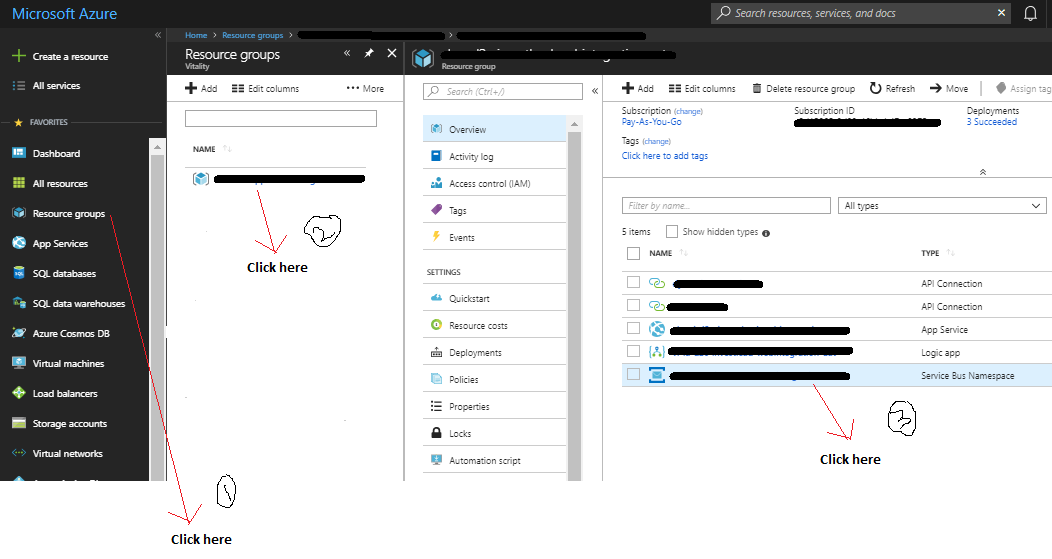
The Azure Service Bus namespace is the primary container in which all of the Azure Service Bus services (Queues, Topics, Relays, and Event Hubs) reside. It offers a logical grouping of all related Service Bus services used within the same application.
Please refer below link to know in detail how to create a Service Bus namespace:-
https://docs.microsoft.com/en-us/azure/service-bus-messaging/service-bus-create-namespace-portal
Topic
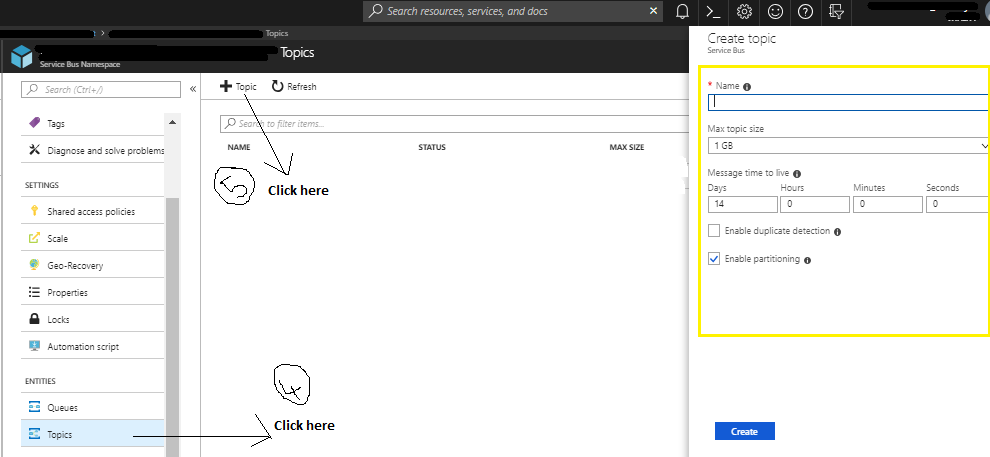
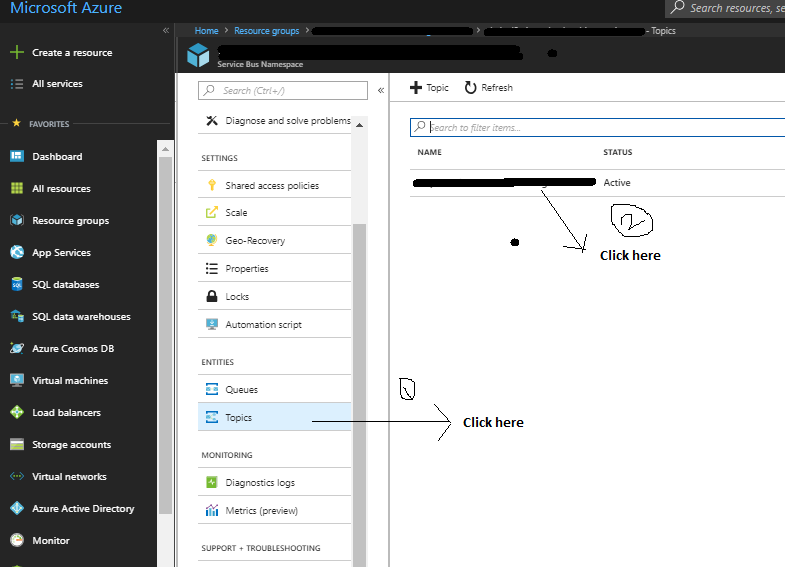
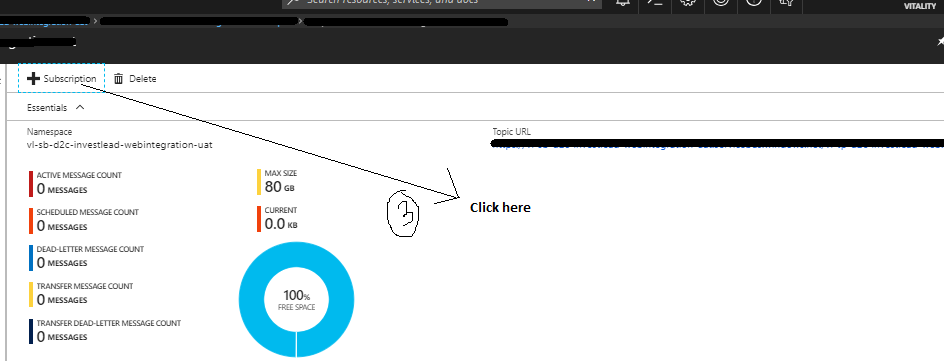
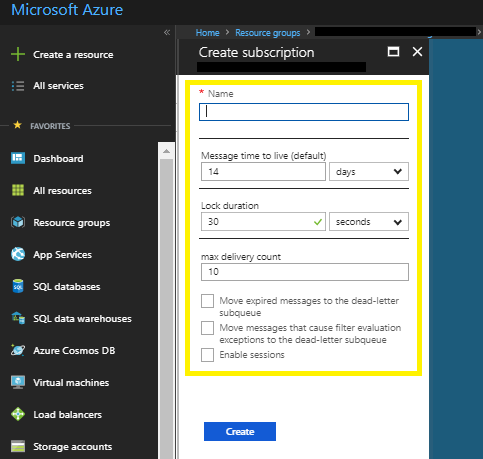
Messages are sent to a topic and delivered to one or more associated subscriptions, depending on filter rules that can be set on a per-subscription basis. Now, lets see how to create a Topic:-
3. Logic App
Logic App is a part of Azure App Service and it is basically used to automate the access and use of data across clouds without writing code. Now, lets see how to create a Logic App:-
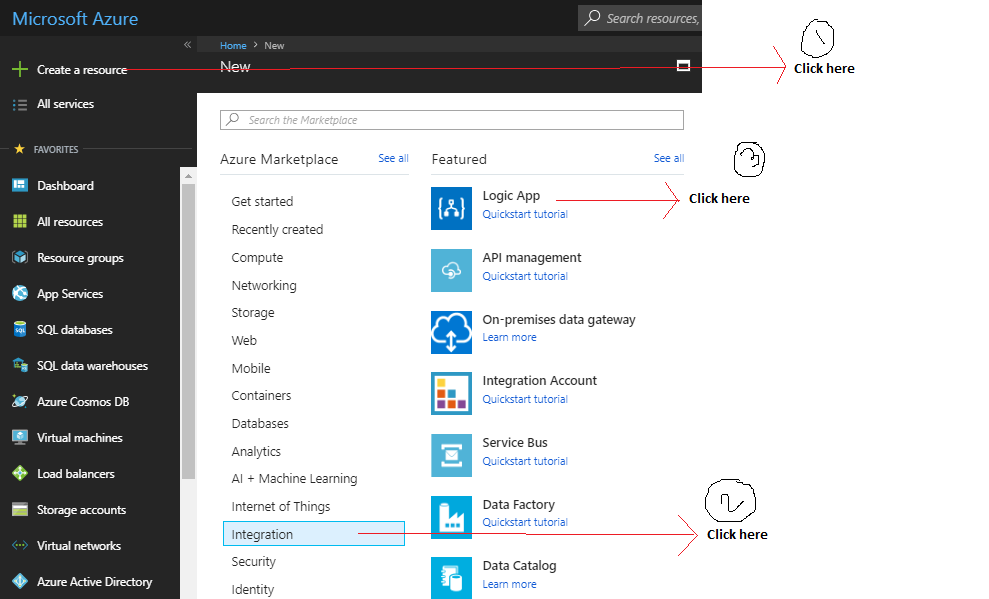
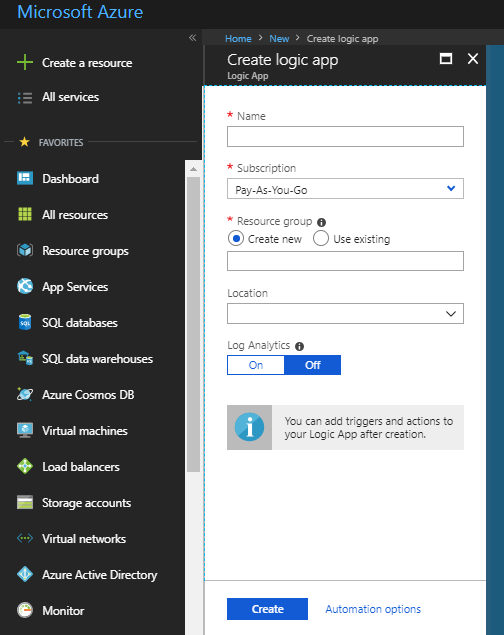
Name: Enter a unique name for your new Logic App.
Subscription: Select your Microsoft Azure subscription.
Resource group : Select use existing and select the resource group you have created in the previous step.
Location: Select the location that is closest to your physical location.
4. App Service
App service is used to create powerful cloud apps for web and mobile clients running on any platform or device.
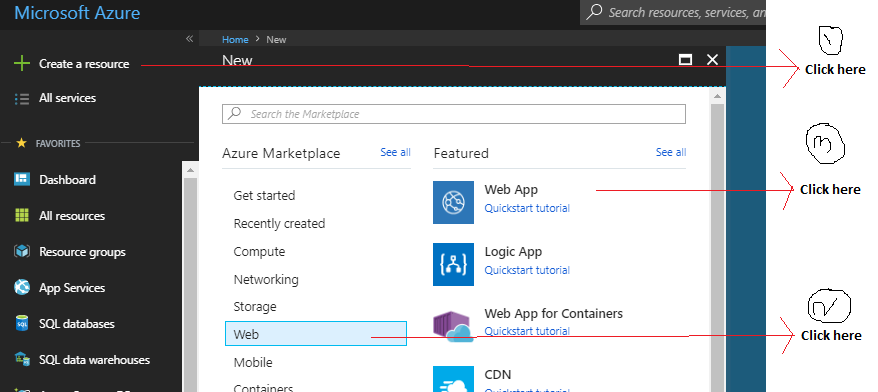
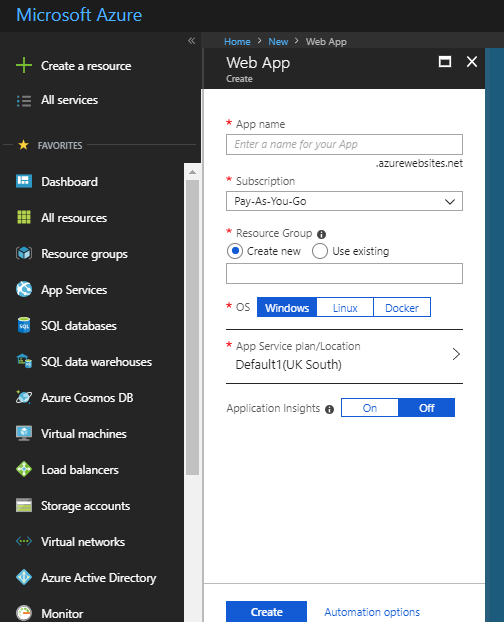
App name: Enter a unique name for your App Service.
Subscription: Select your Microsoft Azure subscription.
Resource group : Select use existing and select the resource group you have create in the previous step.
App Service plan/Location: Select the location that is closest to your physical location.
Now, once you have setup the Azure Portal using following link, let us now learn how to create a web API(c#) that will communicate with the Azure Portal that we have setup:-
Integrate external web resource with Microsoft Dynamics 365 using Azure Service Bus & Logic App
The below link will help you to understand, how to call the web API(c#) that we have created as shown in the above link:-
I hope this helps you!!
Happy CRMing.
Insert data into Many-to-Many relationship in Dynamics CRM very easily & quickly, using the Drag and drop listbox.
http://www.inkeysolutions.com/what-we-do/dynamicscrmaddons/drag-and-drop-listbox
Create a personal / system view in Dynamics CRM with all the fields on the form/s which you select for a particular entity using the View Creator.
http://www.inkeysolutions.com/what-we-do/dynamicscrmaddons/view-creator
© All Rights Reserved. Inkey IT Solutions Pvt. Ltd. 2024
Leave a Reply