
Setup Authentication of Logic Apps using Logic Apps settings
WebSiteAdmin, April 1, 20219409 Views
This time we will see how to authenticate logic apps.
What is Logic Apps?
Azure Logic Apps is a cloud service that helps you schedule, automate, and orchestrate tasks, business processes, and workflows when you need to integrate apps, data, systems, and services across enterprises or organizations.
What we need
-
Postman
-
Basic understanding of the Logic App
We will see how to
-
Set-up authentication of Logic Apps using authentication key as an action
-
Call the logic app via postman
-
Get the IP address using the API
-
Set-up authentication of Logic Apps using Action and Logic App setting
Set-up authentication of Logic Apps using authentication key as an action
-
Create a resource group in Azure.
-
Create a logic App in the specific resource group.
https://docs.microsoft.com/en-us/azure/logic-apps/quickstart-create-first-logic-app-workflow
-
After the logic App is created, you need to select below template to make this Logic App = Manual Triggered.

- Your Logic App will look as the image mentioned below

-
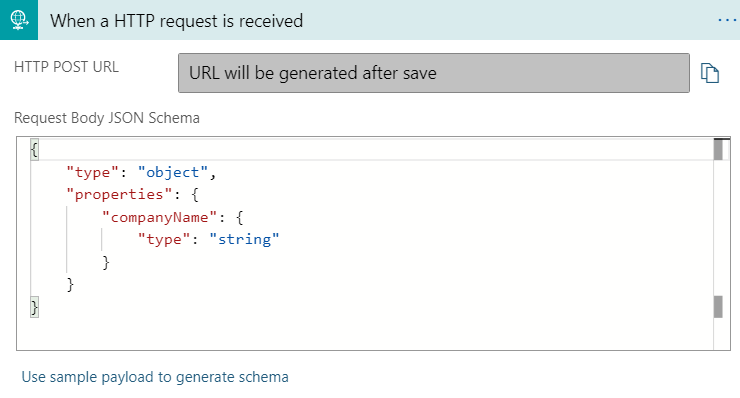
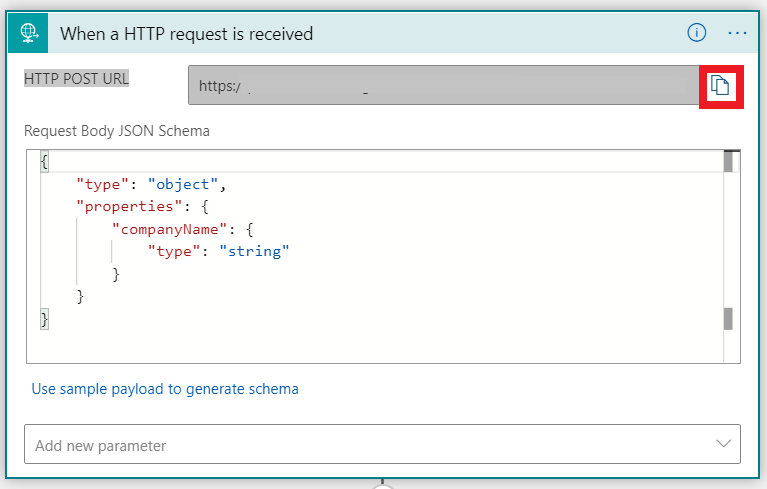
Expand the “When a HHTP request is received” tab.

-
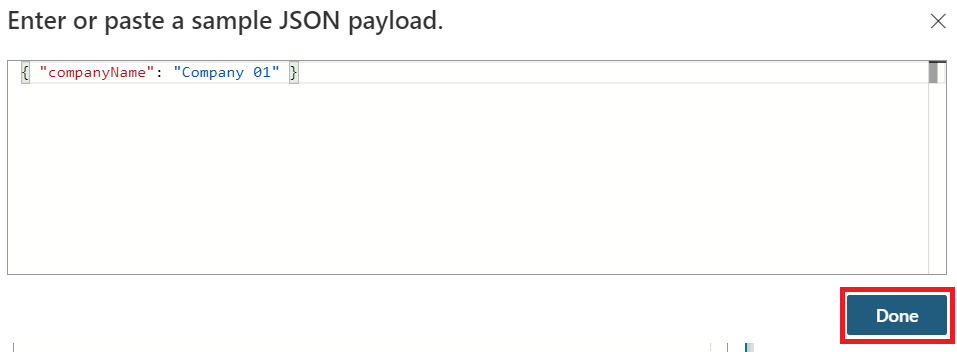
Click on the “Use sample payload to generate schema”. Enter or paste a sample JSON payload. For example see the image mentioned below
-
Click on the “Done” button. Request body JSON schema will be auto populated.
-
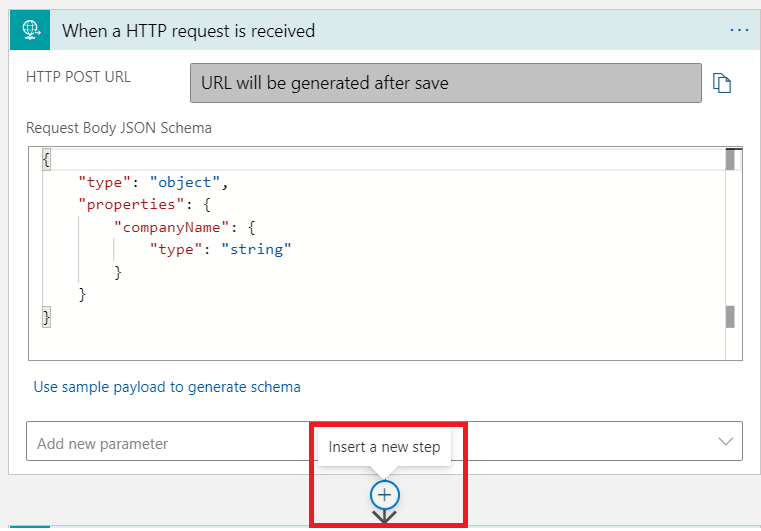
Click on the + button.
 to insert a new step between HTTP request and Response.
-
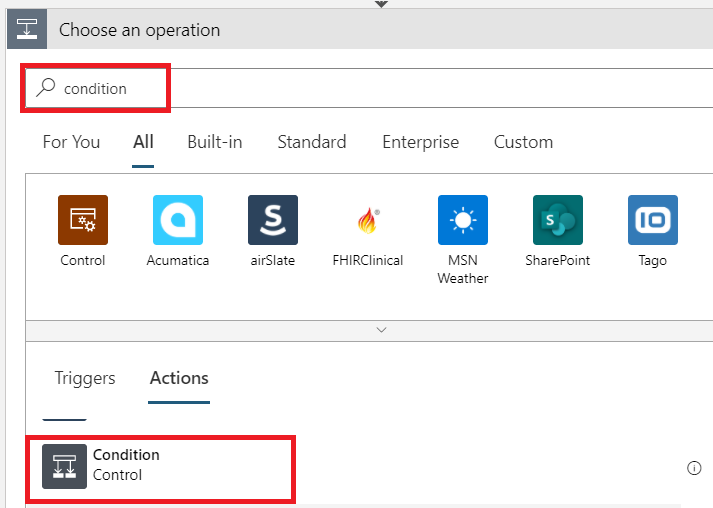
Choose Add an action step.
-
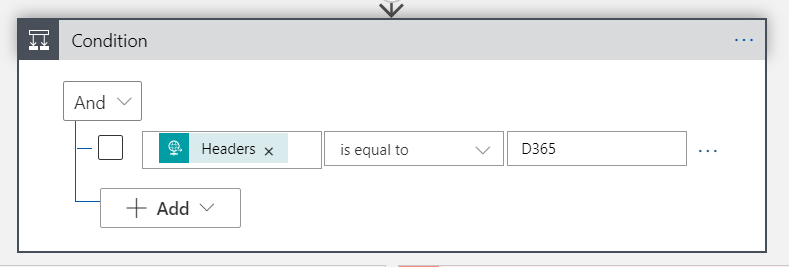
In the search bar type Condition, choose the condition action.
-
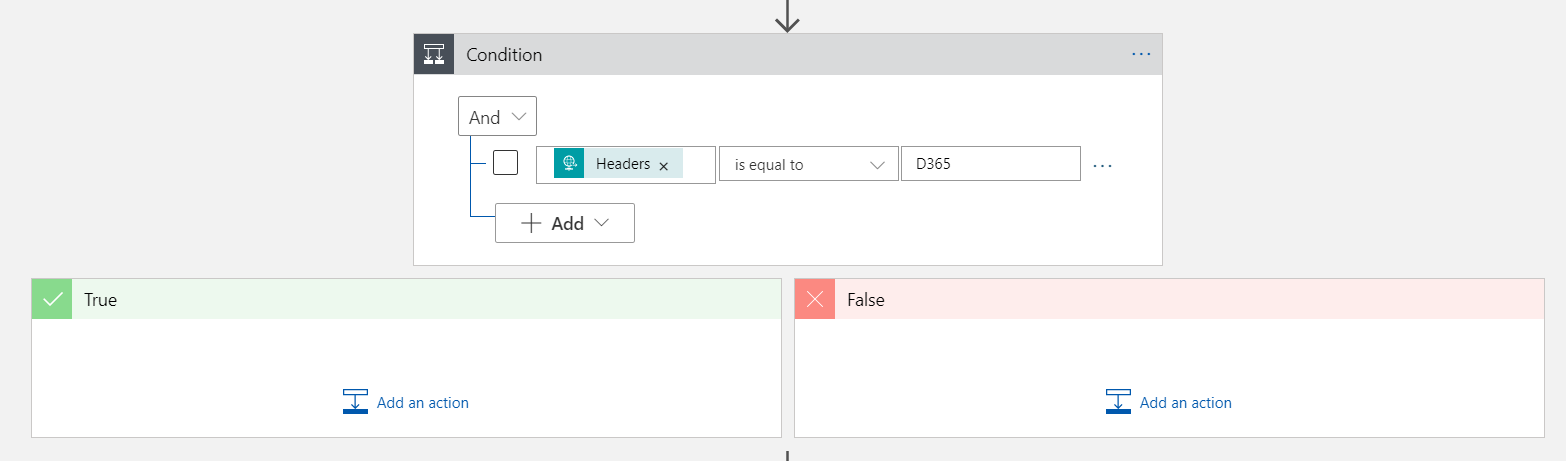
In the condition choose “Headers – is equal to – Give a value of your choice”, in the example below I choose D365.
-
The condition will look as shown in the image below
-
Click on the Code View. Present at the top of the screen. – This should be there when we are adding the Auth action.
-
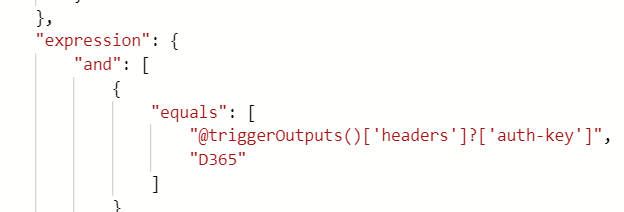
Change the line highlighted to ““@triggerOutputs()[‘headers’]?[‘auth-key’]”,”
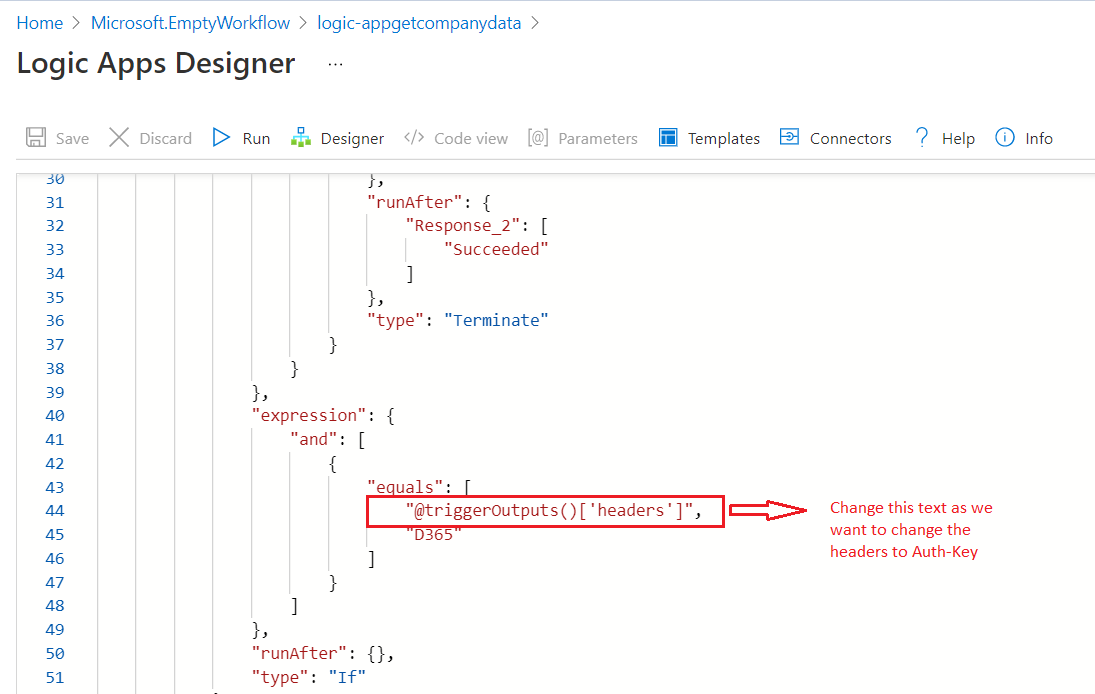
- The code will look as below
-
In the “False” condition click on the Add an Action. In the search bar type “response” and choose the related link.
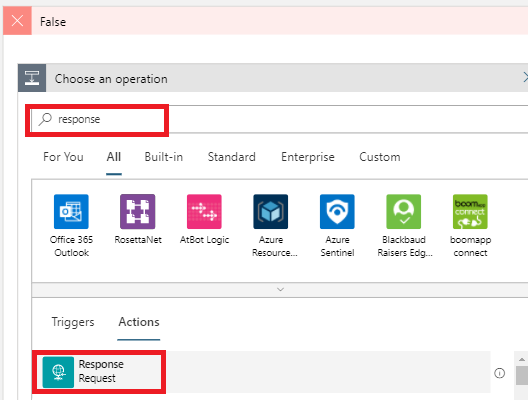
-
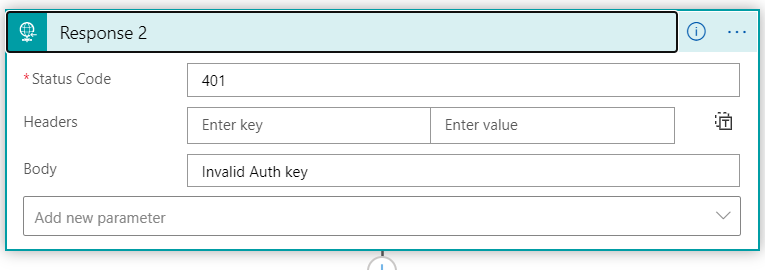
Enter the values as mentioned in the image below
-
Click on “Add an Action”.
-
In the search bar type “terminate” and choose the related link.
-
Drag and Drop “Response” action in the True condition.
-
Expand Response and insert “Success” in the Body field.
-
Save the logic app to generate HTTP POST URL.
-
Copy the HTTP Post URL.
How to call the logic app via postman
-
Open postman at your local machine.
-
Click on the + button to open new request.
-
Click on the Dropdown and change the type from Get to Post.
-
Enter the “HTTP POST URL” and click on the send button.
-
AS there was no Auth key mentioned in Postman, in the Response it returned “Invalid Auth Key”.
-
Once we inserted the Key as Auth-Key = D365 in header. Please notice it is exactly same as we mentioned in the Logic app. Click on the Send button. In the Response notice it returns Success.
How to get the IP address of the API
-
Open Postman in your local machine.
-
Click on the + button to initialize new request.
-
In the enter URL request field enter “ https://api.ipify.org/ “ this URL to get the IP address.
-
In the Response section you will notice the IP address.
To set-up authentication of Logic Apps using Logic App setting
-
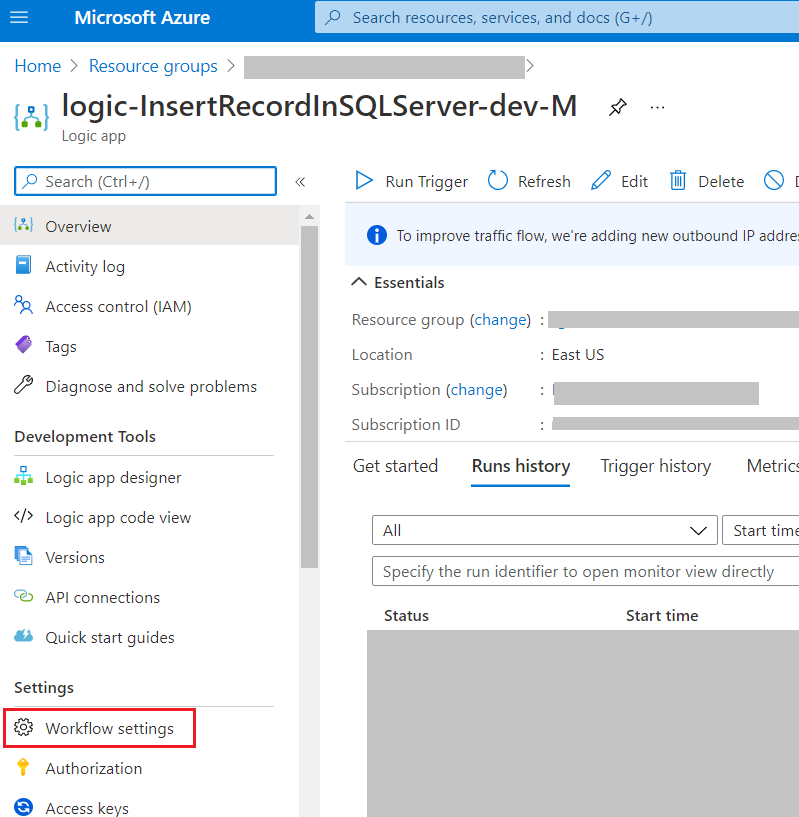
Open the logic app created by you.
-
Click on the “Workflow Setting” from the left side of the screen.
-
Once the Workflow Settings page opens you can see the Access control Configuration.
-
Here in the IP ranges for triggers field you can specify for which IP ranges this workflow should work. Insert the IP address we got from the Postman.
-
In the below mentioned image notice the IP address. At the end of IP ranges for triggers insert /32. For example 10.00.000.000/32.
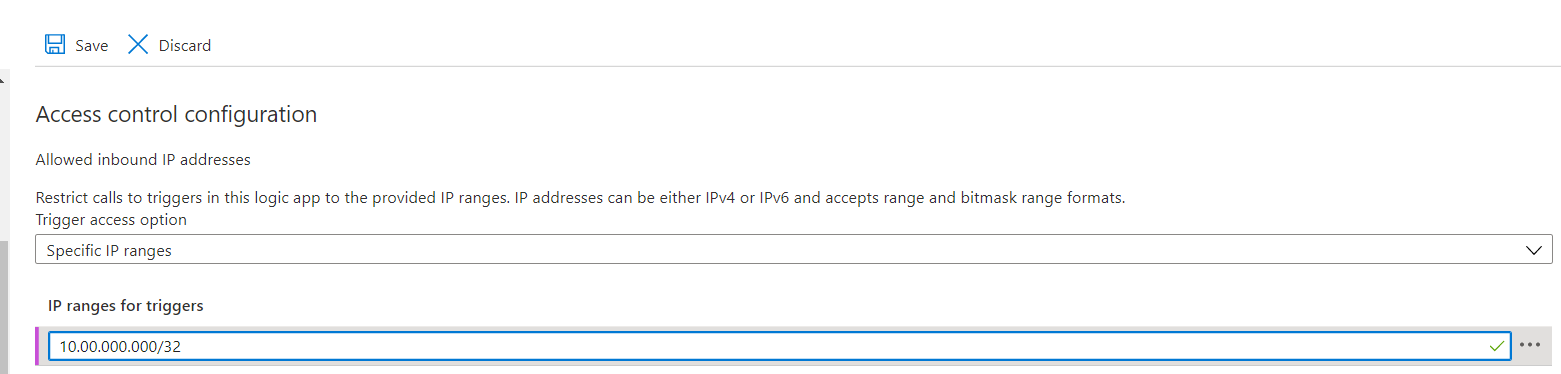
-
You can specify the IP ranges here, which you want this workflow to work on.
Note that this workflow will not work on any of the IP except the one described.
Hope this helps
ATM Inspection PowerApp to ease ATM inspection and report generation process.
https://www.inkeysolutions.com/microsoft-power-platform/power-app/atm-inspection
Insert data into Many-to-Many relationship in Dynamics CRM very easily & quickly, using the Drag and drop listbox.
http://www.inkeysolutions.com/what-we-do/dynamicscrmaddons/drag-and-drop-listbox
Comply your Lead, Contact, and User entities of D365 CRM with GDPR compliance using the GDPR add-on.
https://www.inkeysolutions.com/microsoft-dynamics-365/dynamicscrmaddons/gdpr
Create a personal / system view in Dynamics CRM with all the fields on the form/s which you select for a particular entity using the View Creator.
http://www.inkeysolutions.com/what-we-do/dynamicscrmaddons/view-creator