How to Manage Document Attachments from Customer to Service Order in Service Management in Microsoft Dynamics 365 Business Central?
 By Inkey Solutions
April 17, 2026
3 min read
By Inkey Solutions
April 17, 2026
3 min read
Introduction
Managing important documents is crucial for service operations. Microsoft Dynamics 365 Business Central 2024 update Released Wave 1 now let’s user attach essential documents—like maintenance manuals and warranty certificates—directly to service items, contracts, and invoices. This makes it easier to access important information on the go, improving service delivery.
Business Value
By digitizing document management, users can quickly access vital service-related documents. This helps the user team work faster and reduces the chances of losing important paperwork, leading to better productivity and service quality.
The new Flow to Service Trx toggle in business central lets users decide how attached documents are managed across different service transactions. Here’s how it works:
- Item to Service Item: Link documents to specific service items or lines.
- Customer to Service Order: Attach documents when user selects a customer.
Requirement
- How to Manage Document Attachments from Customer to Service Order in Service Management in Microsoft Dynamics 365 Business Central?
Prerequisites
- Ensure users are using the latest version of Microsoft Dynamics 365 Business Central.
- Verify that User have the necessary permissions to modify user settings and posting policies.
Solution (Implementation Steps)
- Customer to service Order
Step 1: Let’s covered first scenario Attached Document in item card.
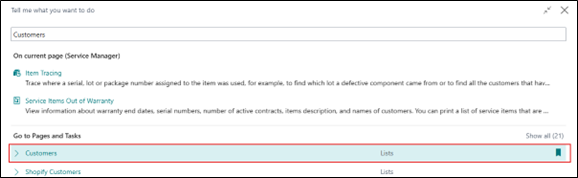
- The First step is Click on Search icon and search for Customer and Navigate to the Item list page in Business Central.
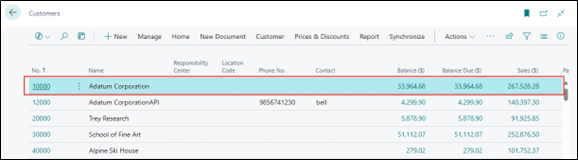
- Now open one of the Customer from the list by clicking on the selected Customer.
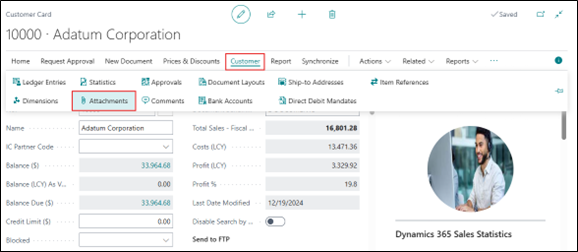
- To attach a document to the Customer Card, click on Customer, then select Attachments from the menu bar.
- Click on Attach File(s)… to upload document.
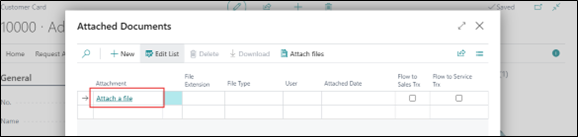
- Click on Drop a file here to Upload or Click here to browse.
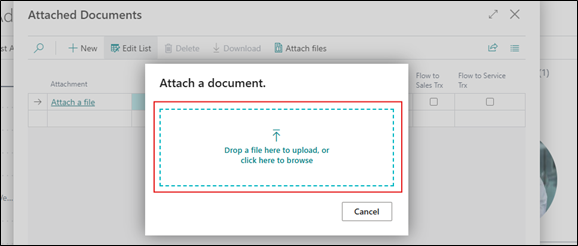
- Now select the document from the device and upload it here.
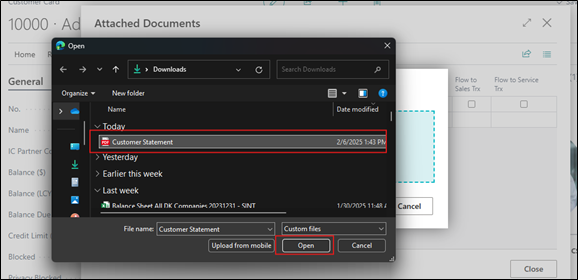
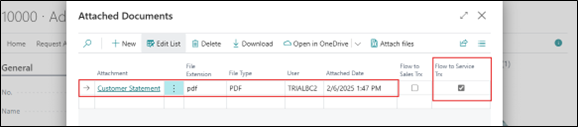
- Now the user can see the attached documents in the line. Here, users need to select the Flow to Service Trx This option allows the attached documents to flow into the related service documents.
Step 2: Create Service Order for this Customer.
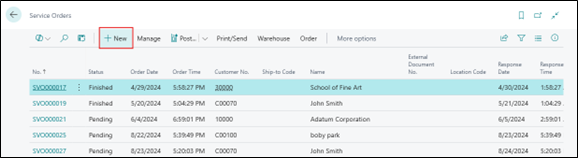
- Now Click on Search icon and search for Service Order and Navigate to the Service Order list page in Business Central.
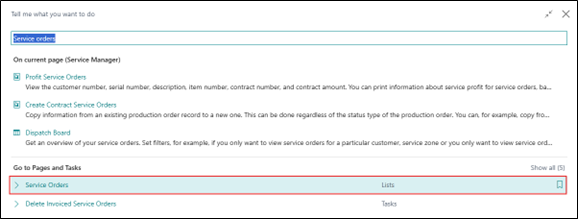
- Now create a new Service Order from the list page by clicking on the +New
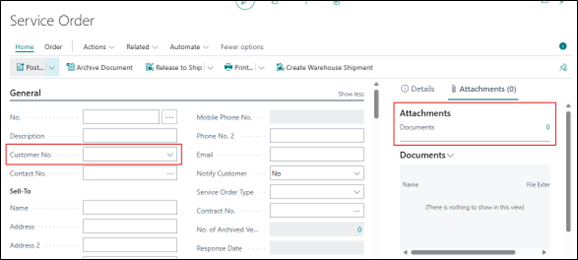
- A new blank Service Order Card will open, where the user will see that the Attachments section in the FactBox does not contain any attached documents until a Customer No. is selected on the Service Order Card.
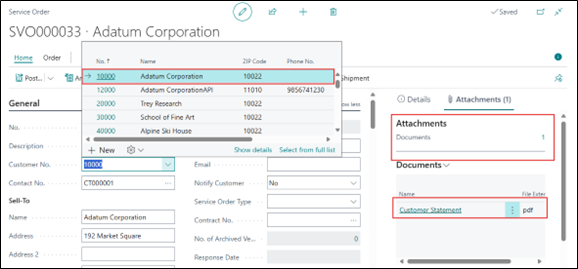
- When the user selects Customer No. on the service Order, they can see the attached documents that are linked to the main Customer card.
Conclusion
The new document attachment capabilities in Microsoft Dynamics 365 Business Central significantly enhance the management of service-related documents. Attaching documents in Business Central makes service management easier. By linking documents from the Customer Card to the Service Order, users save time, reduce manual work, and keep all important files in one place. This improves service efficiency and helps teams provide better customer support.