How to Get a Static IP Address for Azure Data Factory Using Self-Hosted Integration Runtime and Azure Virtual Machine
In today’s dynamic cloud environment, achieving a consistent and reliable IP address for your Azure Data Factory (ADF) is crucial for secure and seamless data integration processes. Utilizing a Self-Hosted Integration Runtime (SHIR) and an Azure Virtual Machine (VM) provides an effective solution to this requirement. This blog details the step-by-step process to achieve a static IP address for Azure Data Factory using these Azure services.
Introduction
Azure Data Factory is a robust cloud-based data integration service that allows data movement and transformation between diverse data sources. However, when connecting to on-premises data sources or services that require a fixed IP address for security reasons, the ephemeral nature of cloud IP addresses can pose a challenge. By setting up a Self-Hosted Integration Runtime on an Azure VM, you can ensure a static IP address, providing a stable endpoint for your data activities.
Prerequisites
Before we begin, ensure you have the following:
- An active Azure subscription.
- Permissions to create and manage resources in Azure.
Step-by-Step Guide
Step 1: Set Up an Azure Virtual Machine
Next, set up a Virtual Machine within the VNet to host the Self-Hosted Integration Runtime.
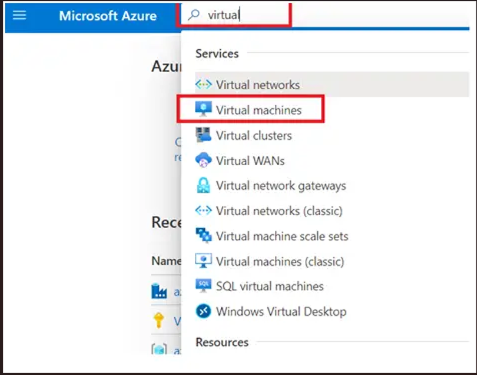
Create a VM: Go to “Search Bar” > “Virtual Machine”.
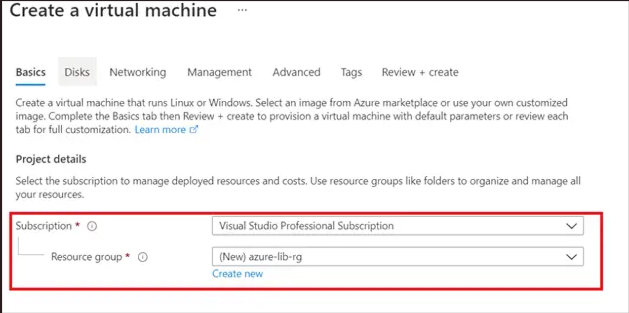
Configure the VM:
- Subscription: Enter your subscription details and resource group .
- Name: Provide a unique name for the VM.
- Region: Choose the same region as your VNet.
- Image: Select an appropriate Windows Server image.
- Size: Choose a size based on your workload requirements.

Connections:
- Select the user name and password for connecting to the azure virtual machine.

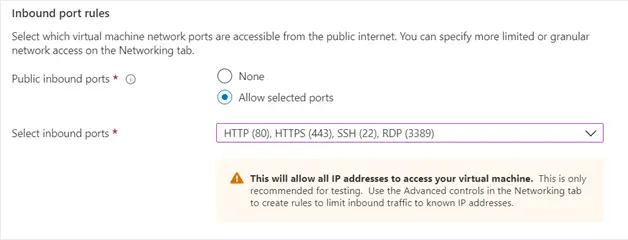
Inbound Port Rules:
- Define the inbound port rules, to make it enable for the connection. I have made the RDP enable to connect the virtual machine using the remote desktop.
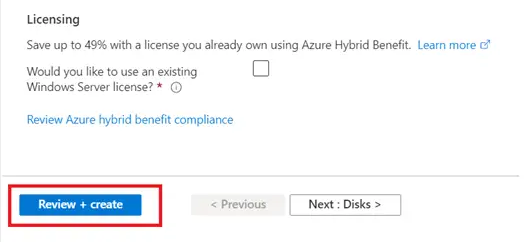
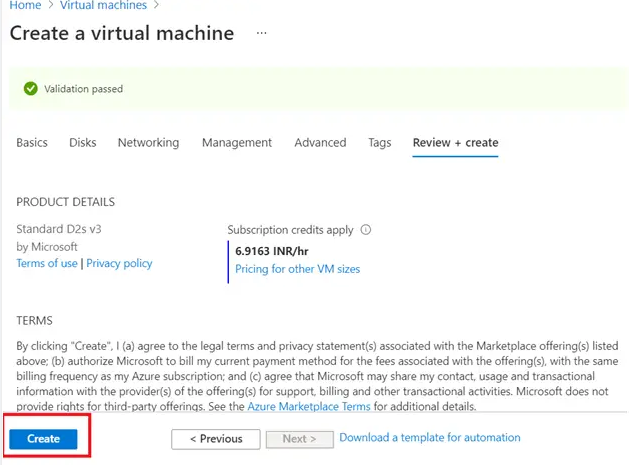
Review and Create: If you have a license available you can use it to reduce the cost otherwise click review and create.
Costing review: Review page will look like below, if all looks ok with the costing then click on the create to finish this step.
Step 2: Open the Azure VM
To download and install the Self-Hosted Integration Runtime, you need to access your Azure VM.
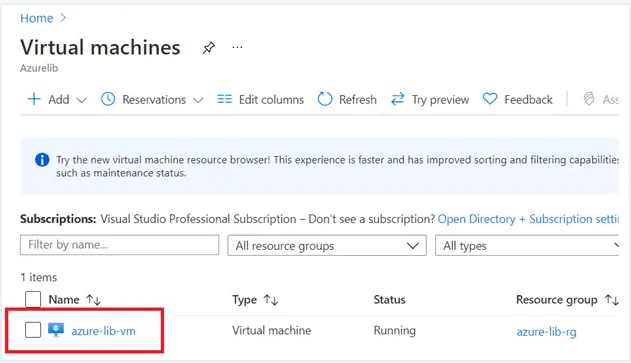
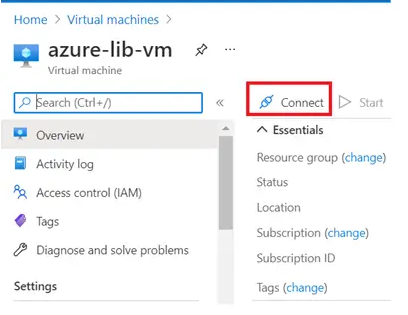
Navigate to the VM: In the Azure Portal, go to “Virtual Machines” and select your VM.
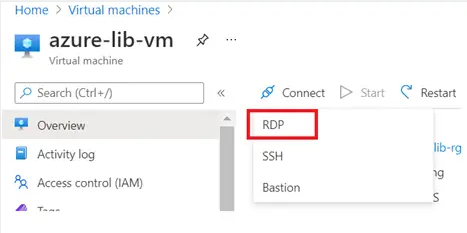
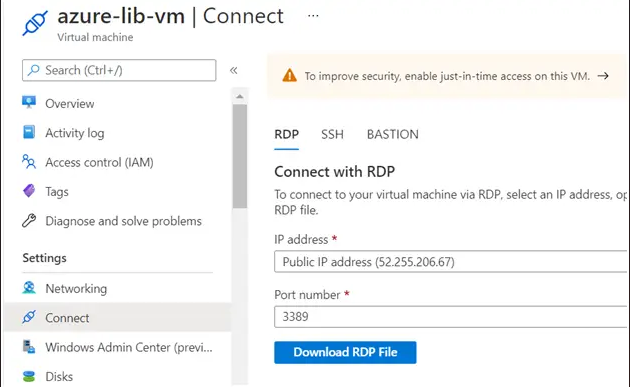
Connect to the VM:
- RDP: Click on “Connect” and choose “RDP” for Windows VMs.
- Download RDP File: Download the RDP file and open it.
- Login: Use the credentials you set up during the VM creation to log in.
Step 3: Create and Configure the Self-Hosted Integration Runtime (SHIR)
Follow these steps to create and configure the Self-Hosted Integration Runtime:
Navigate to Azure Data Factory: In the Azure Portal, go to your Azure Data Factory instance.
Create a New Integration Runtime:
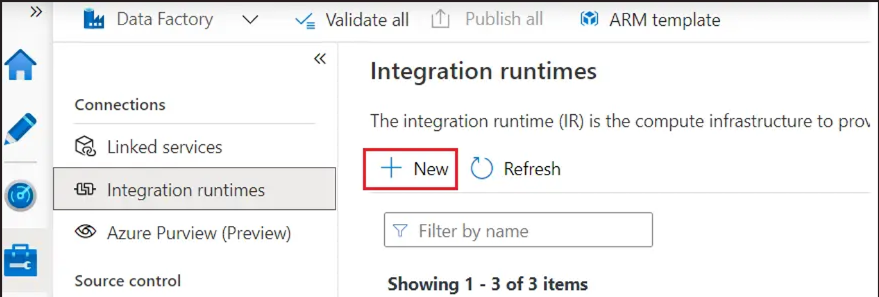
- Access Integration Runtimes: Go to “Manage” > “Integration Runtimes”.

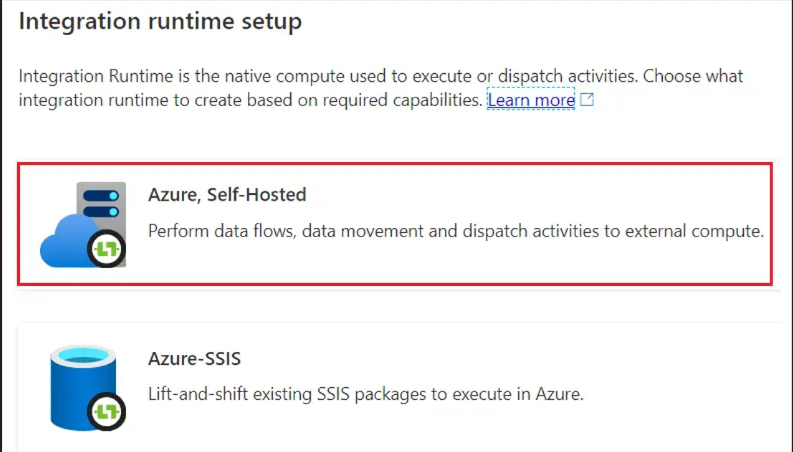
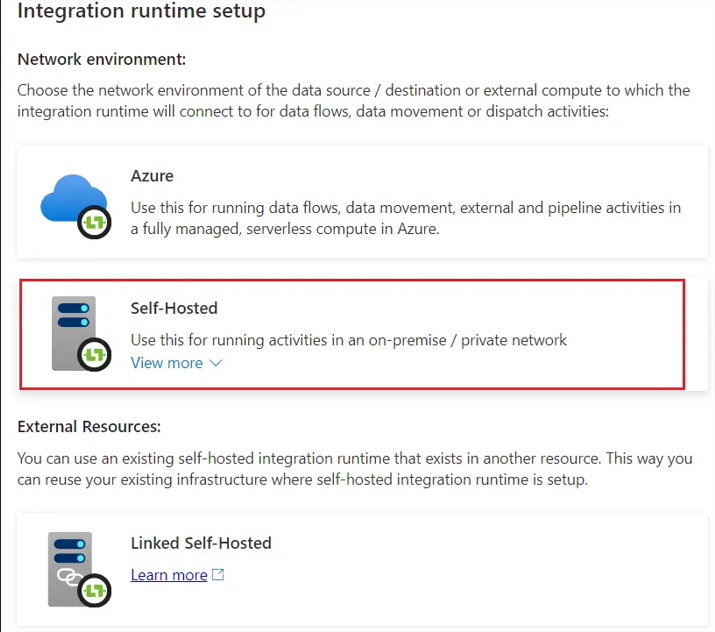
- Add New Runtime: Click on “+ New” and select “Self-Hosted”.
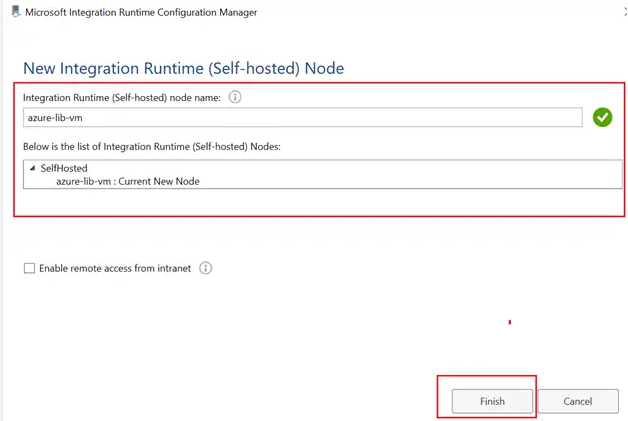
- Name and Description: Provide a name and optional description for the new SHIR.
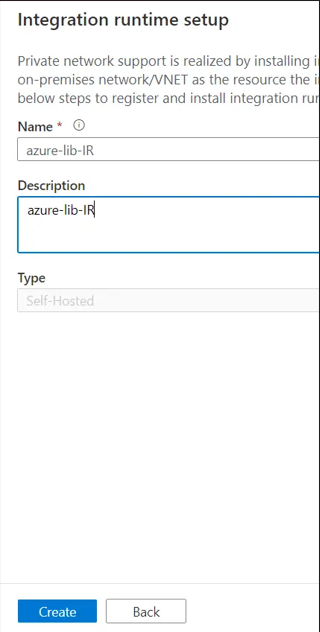
- Review and Create: Validate the configuration and create the new integration runtime.
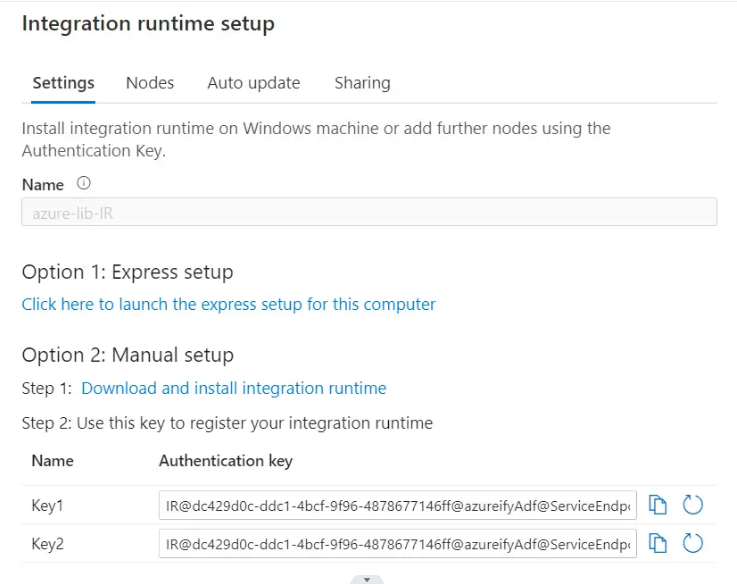
Download SHIR Installer:
- Download: After creating the SHIR, you will be provided with a link to download the installer. Download this installer to your Azure VM.
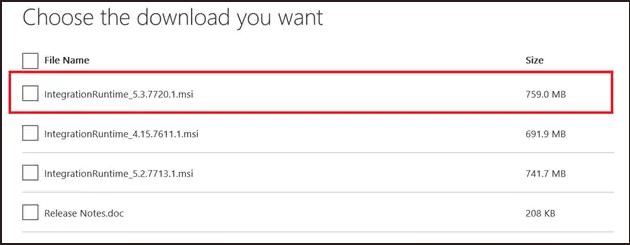
Choose the latest version to download
Install SHIR on the VM:
- Run the Installer: Execute the downloaded installer on your Azure VM.
- Register SHIR: During the setup, you will be prompted to register the SHIR with your Azure Data Factory. Enter the authentication key provided during the creation of the SHIR.
- Complete the Installation: Follow the installation wizard to complete the setup.
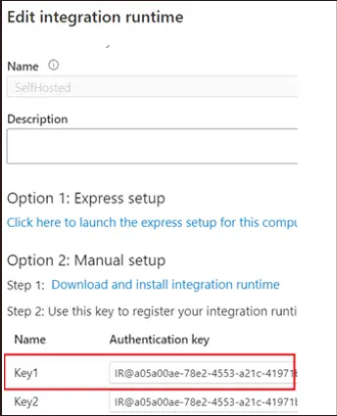
Copy the Key1 from the SHIR and paste it in the RDP setup

Once you enter the Key in the Box click on register
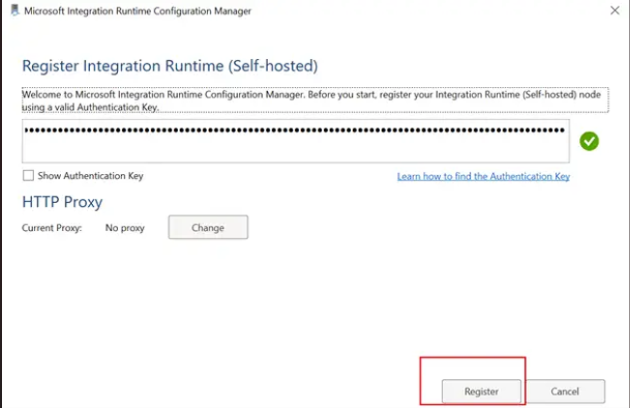
If your key is right it will show green right mark and register button would be enabled. Just click the register to complete the process.
You will see this message in azure VM
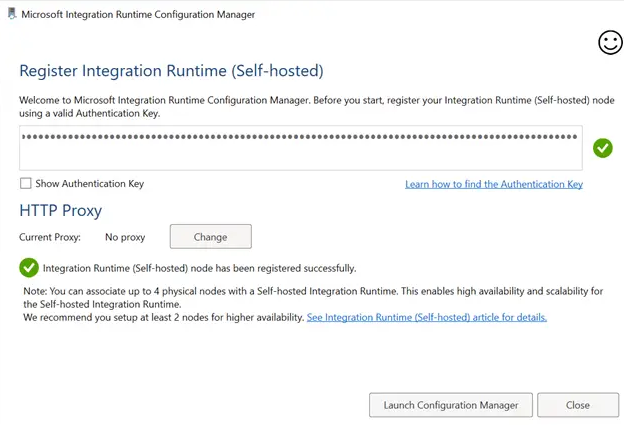
Now if you go back to ADF and see IR it will become green and running.

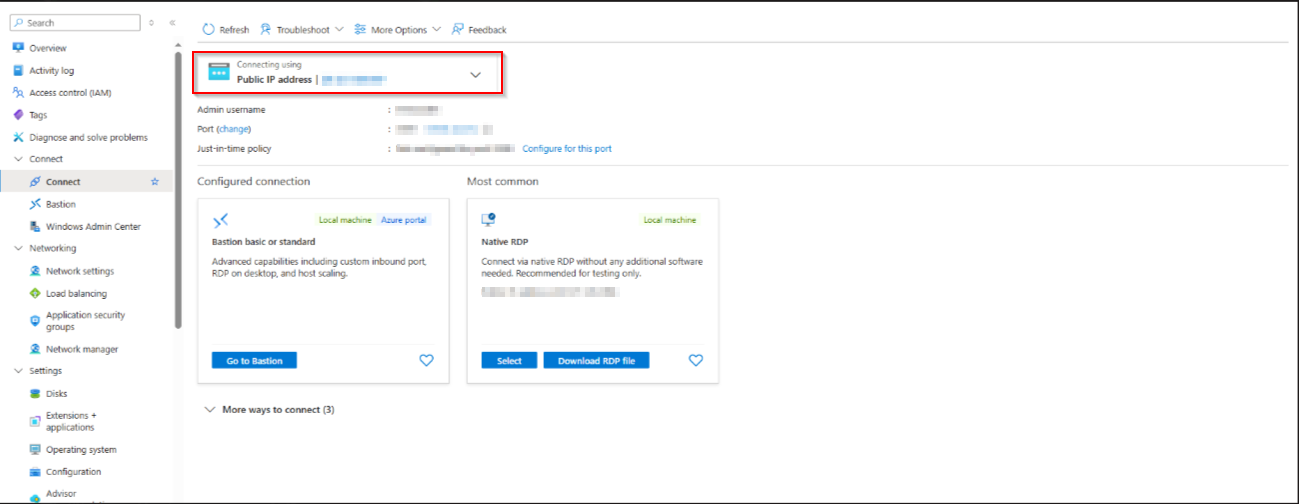
Step 4: Fetch the Static IP Address
Now if you go to VM and Click on the Connect tab from the list of tabs in the left side you will see the Public IP address and you can use it to any services which requires static IP address of your Azure Data Factory
Step 5: Validate the Setup
Ensure that your setup is working as expected by performing the following checks:
Test Connectivity: Use the SHIR to connect to your on-premises data sources or any other services requiring a static IP.
Monitor Activities: Check the ADF monitoring dashboard to ensure successful data movement and transformation activities.