How to create a Horizontal Scrollable Gallery in Power Apps (Canvas Apps)
Hello Power Apps User.
Let’s take a scenario in Canvas Apps. Suppose we want to display 6 columns in a Vertical gallery. Then, we can easily achieve it by the following steps:
- Add Blank Vertical Gallery.
- Add multiple labels/any other controls inside the gallery.
- Add necessary DataSource to the Items property of the Gallery and refer it to those controls you’ve added.
- Turn on the “Show scrollbar” property of the gallery. If your data source has multiple items such that it surpasses the gallery height, then the Vertical scrollbar will start to appear, and with the help of the vertical scroll you can see other records, through simple scrolling.
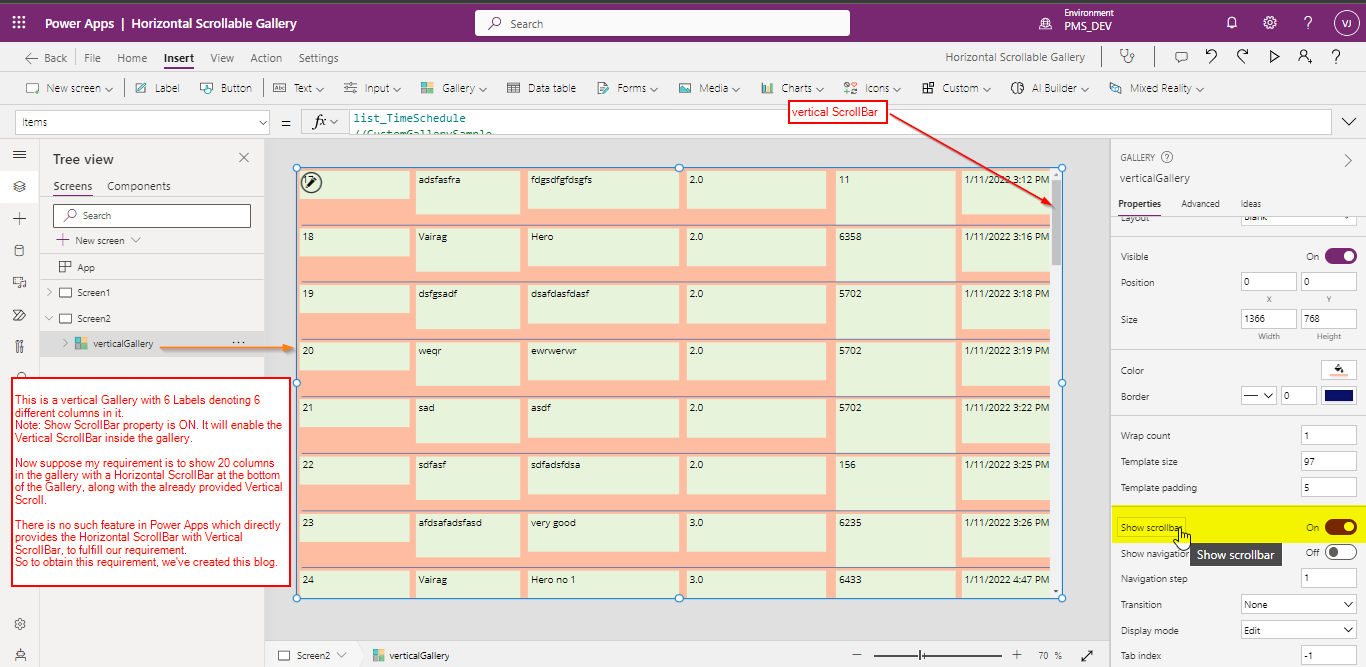
Now, suppose you have 10+ columns to be displayed in the vertical Gallery, then the vertical scrollbar will help you facilitate the vertical scroll, but Power Apps does not facilitate you with the horizontal scrollbar which we need to create on our own. This blog will help you to achieve the same requirement of creating a vertical gallery supporting both horizontal scrolls and vertical scrolls.
Discover the power of our services:
Power BI, Microsoft Business Intelligence, SQL Server, Microsoft Fabric, and Business Central. By the power of these services, from advanced analytics to seamless business integration, we’ve got the expertise you need to optimize operations and drive growth. Harness the potential of your data infrastructure with our comprehensive suite of solutions.
Below are the steps to create a vertical gallery with both horizontal scroll and vertical scroll property:
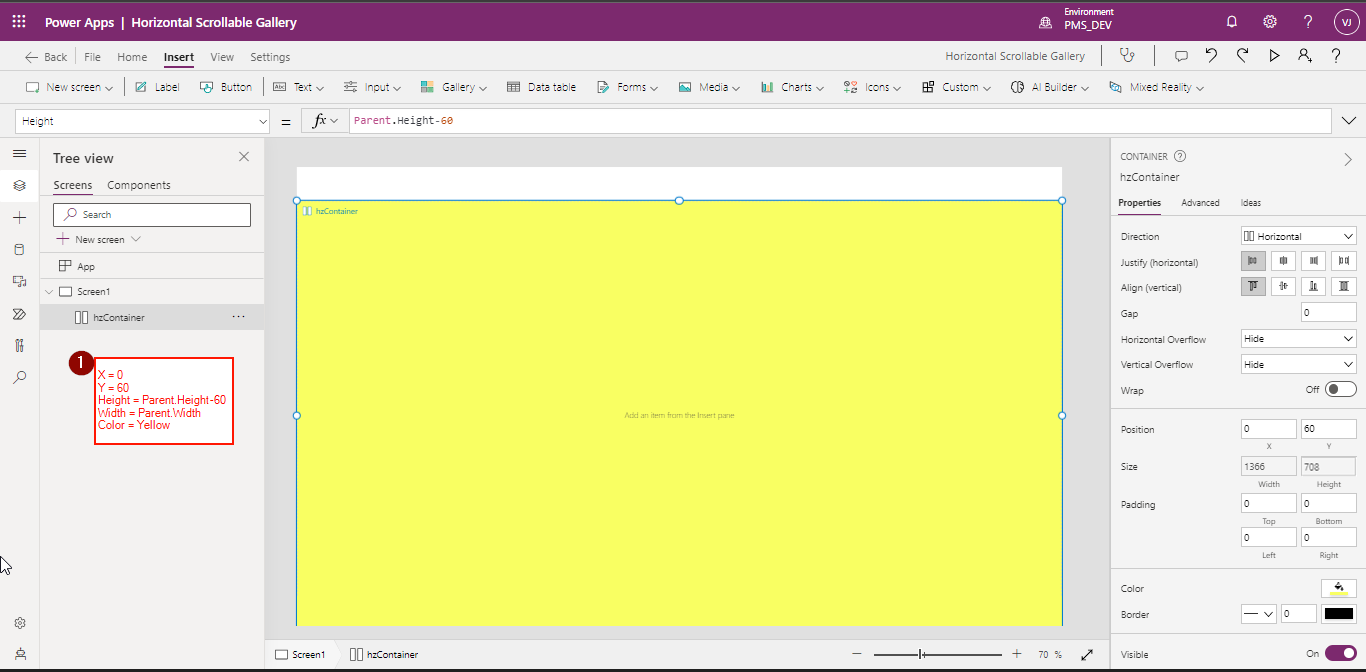
- Create a Horizontal Container “hzContainer”.
Set hzContainer properties as below:
X = 0
Y = 60
Height = Parent.Height-60
Width = Parent.Width
Color = Hexcode: FFFF00 Or RGBA(255, 255, 0, 1)
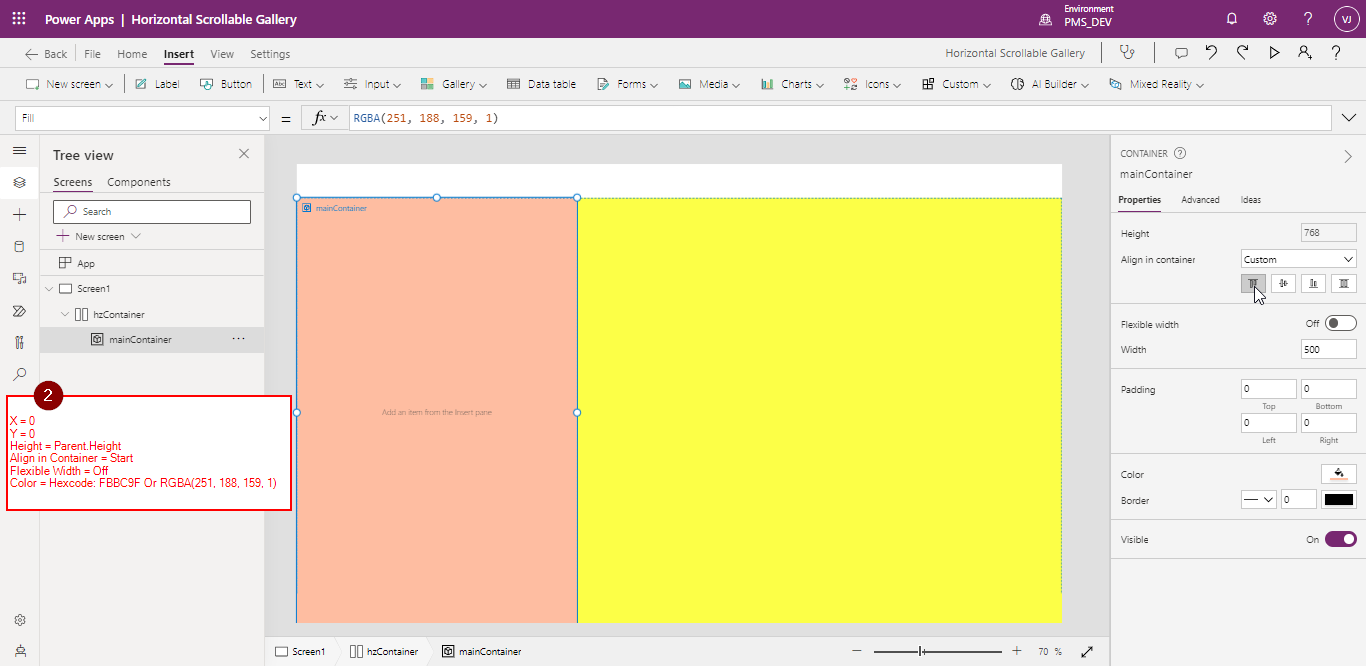
- Inside hzContainer, insert a Main Container “mainContainer”
Set mainContainer properties as below:
X = 0
Y = 0
Height = Parent.Height
Align in Container = Start
Flexible Width = Off
Color = Hexcode: FBBC9F Or RGBA(251, 188, 159, 1)
- Inside mainContainer create 2 more objects, a container for headers, “headerContainer” and a blank vertical gallery called “gallery”
Set headerContainer properties as below:
X = 0
Y = 0
Height = 500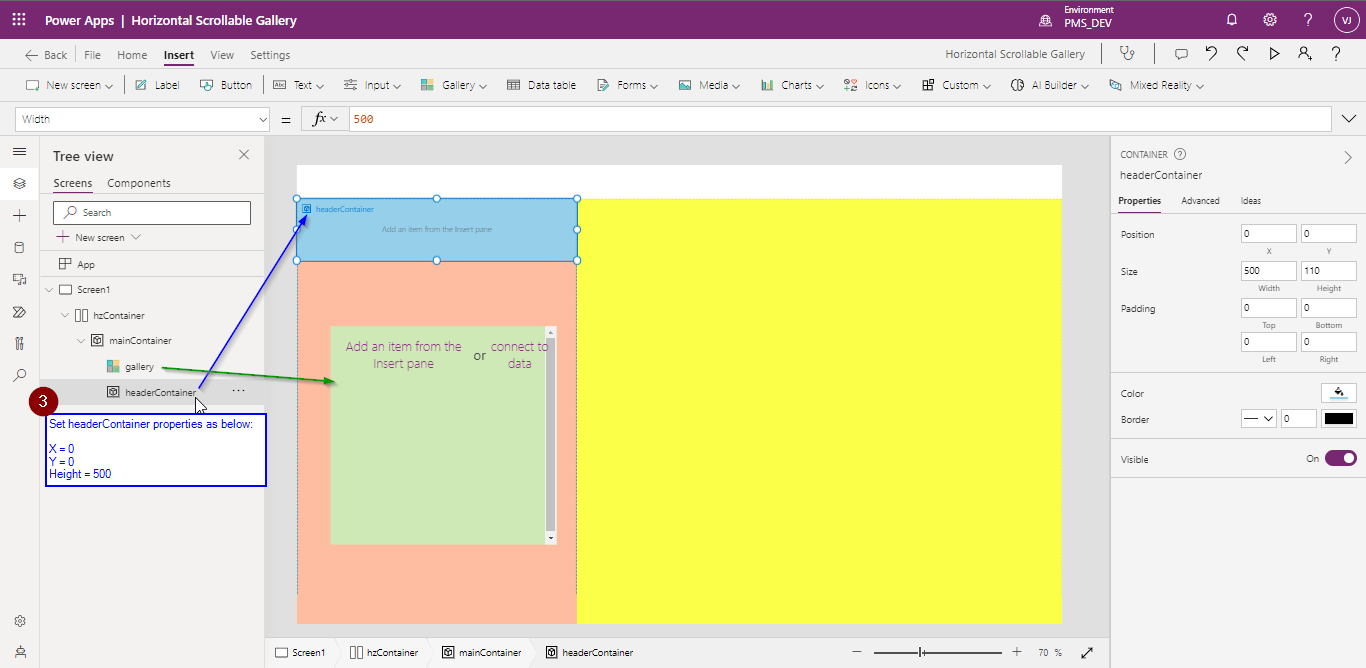
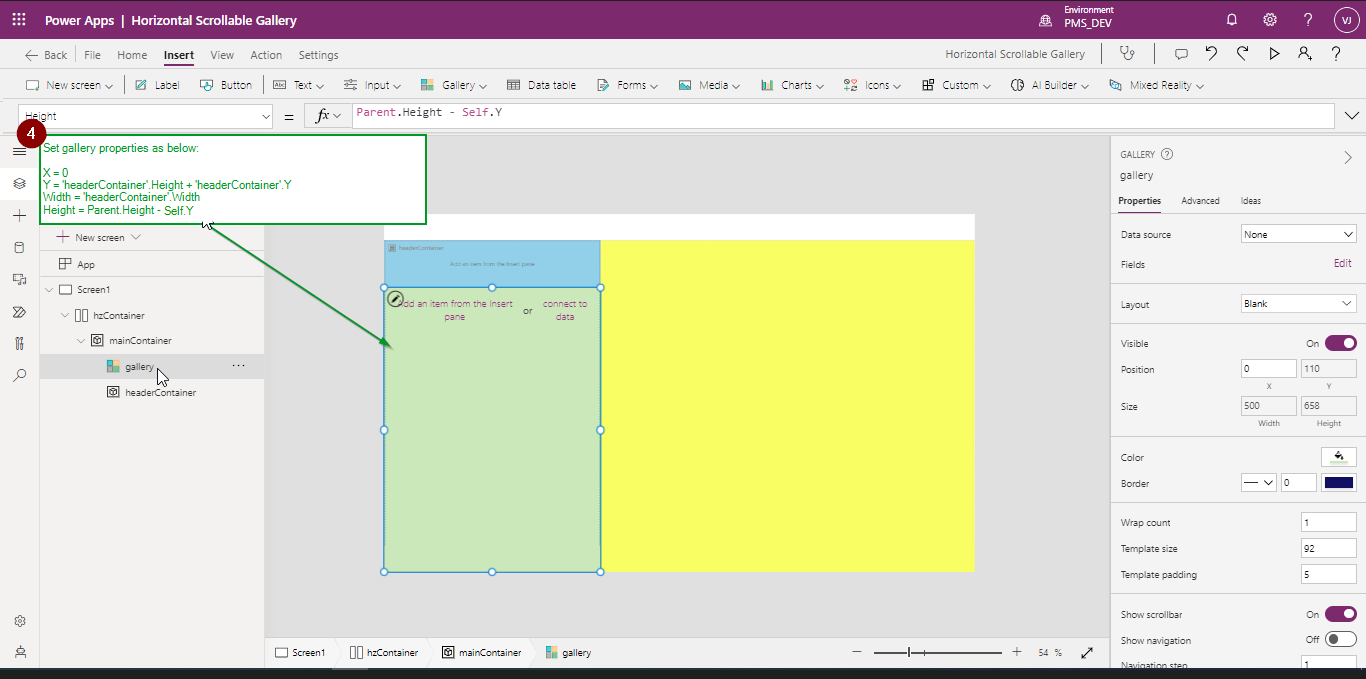
- Set gallery properties as below:
X = 0
Y = ‘headerContainer‘.Height+’headerContainer‘.Y
Width = ‘headerContainer‘.Width
Height = Parent.Height – Self.Y
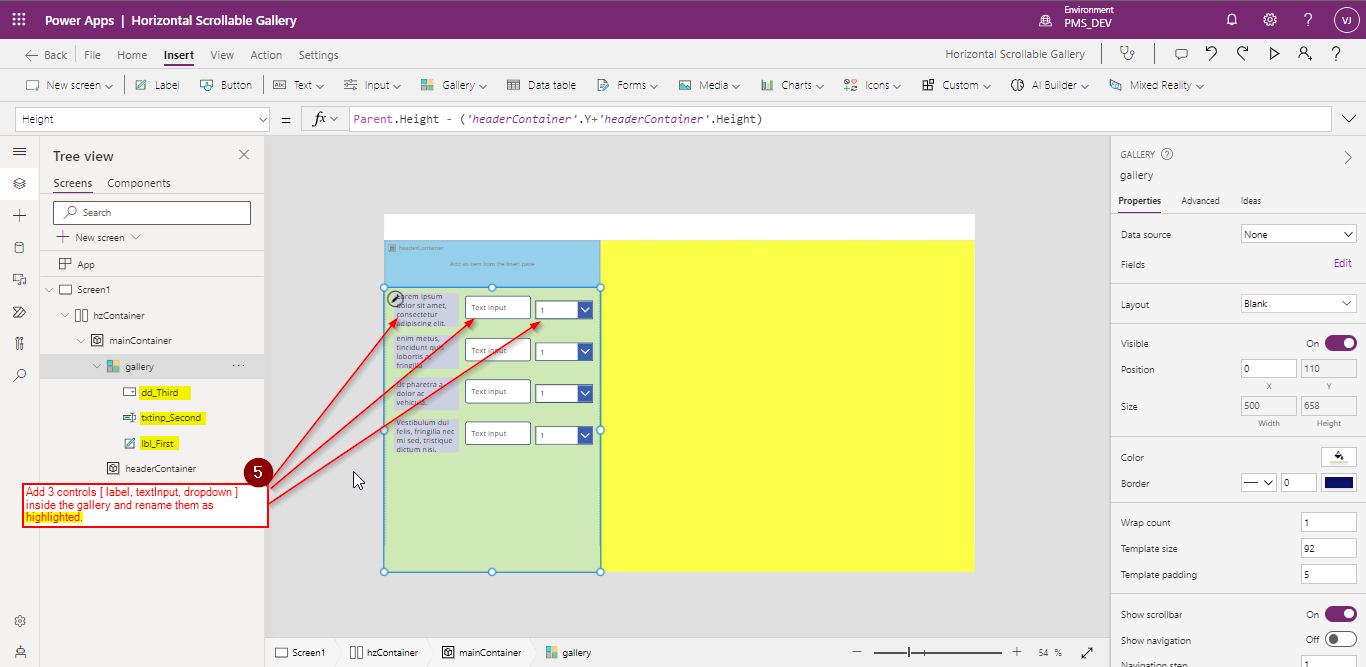
- Add 3 controls [ label, textInput, dropdown ] inside the gallery as shown in the below image.
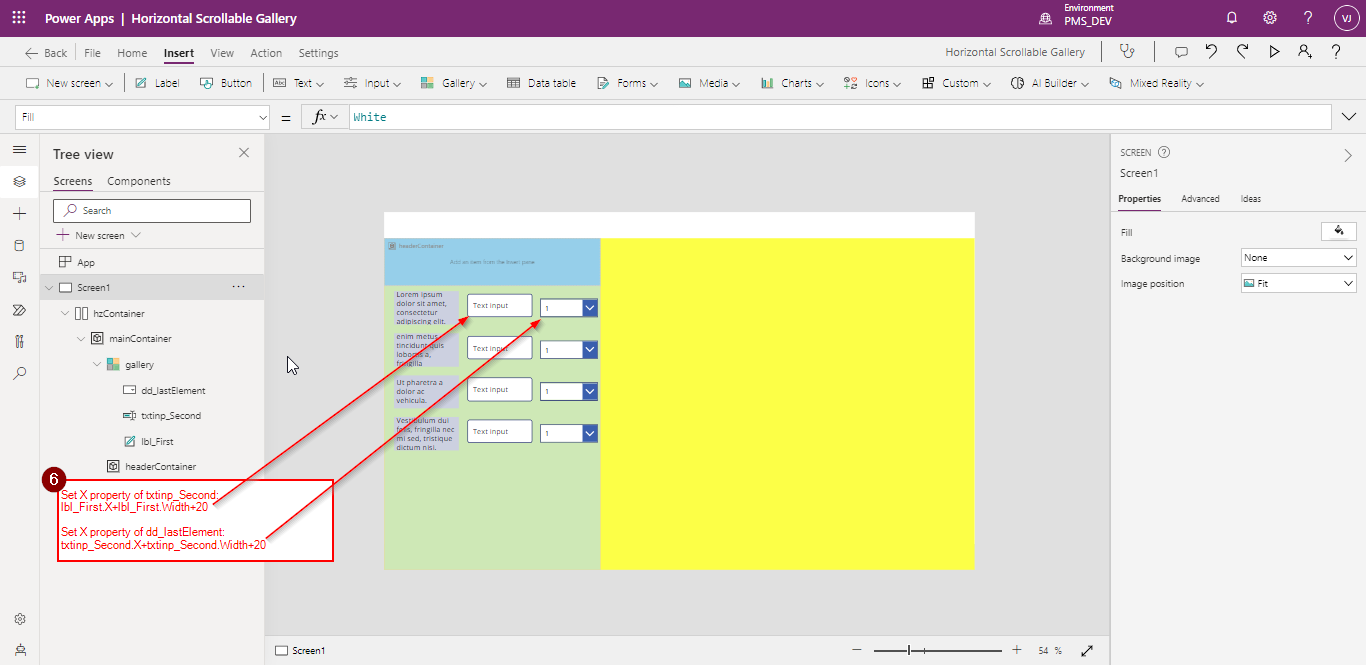
- Set X property of txtinp_Second:
lbl_First.X+lbl_First.Width+20
Set X property of dd_lastElement:
txtinp_Second.X+txtinp_Second.Width+20
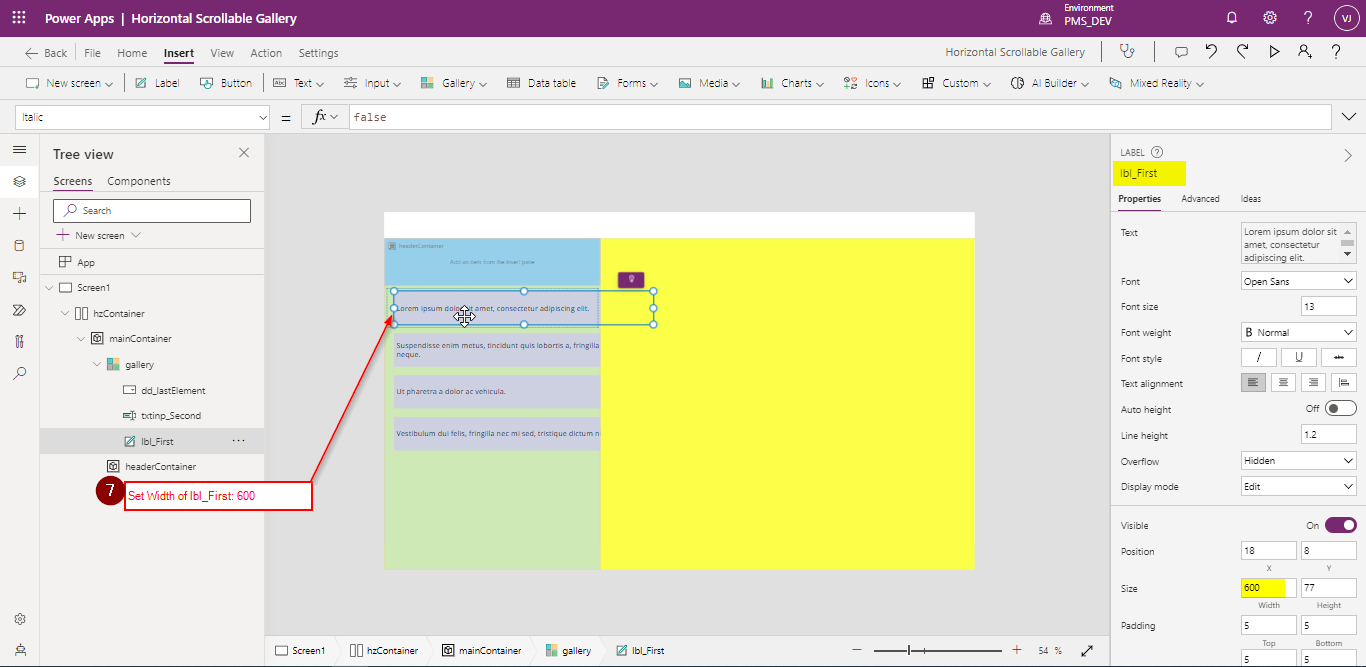
- Set Width of lbl_First: 600
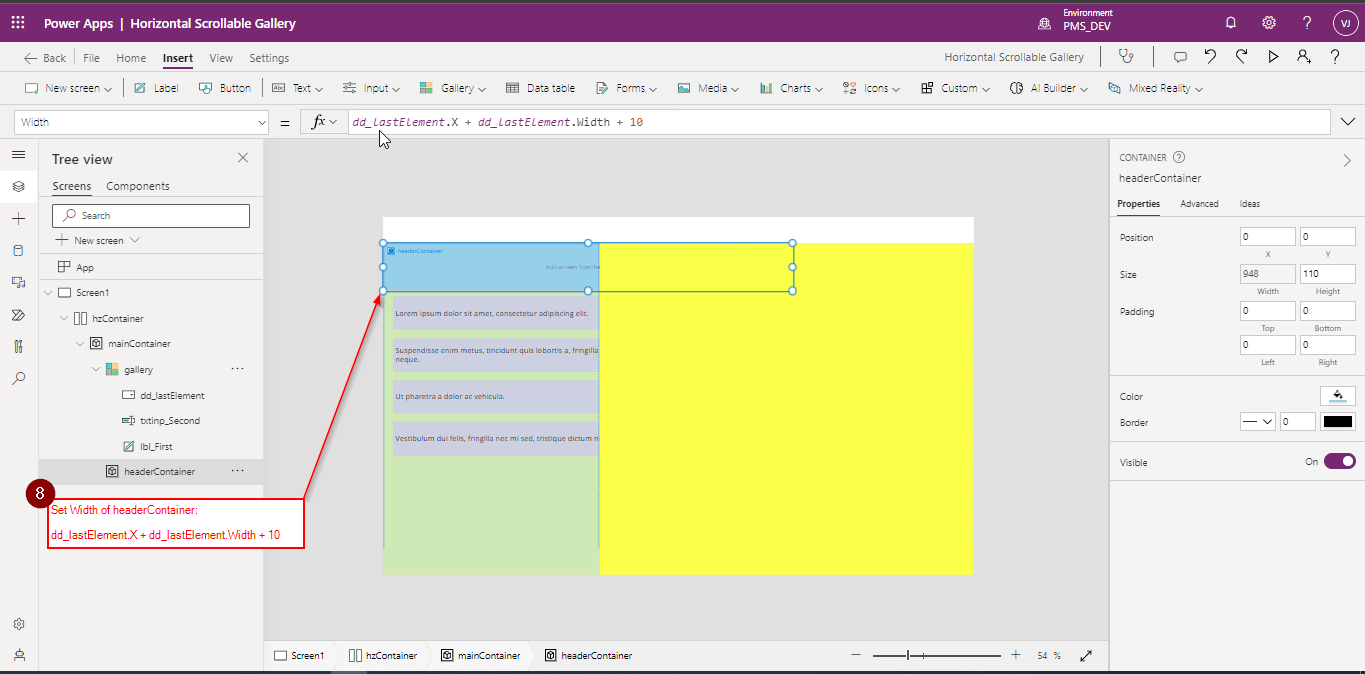
- Set Width of headerContainer: [Here, if we have multiple controls in the gallery, then the last placed control in the gallery is to be placed in the below formula.]
dd_lastElement.X + dd_lastElement.Width + 10
- Set Width of mainContainer:
gallery.Width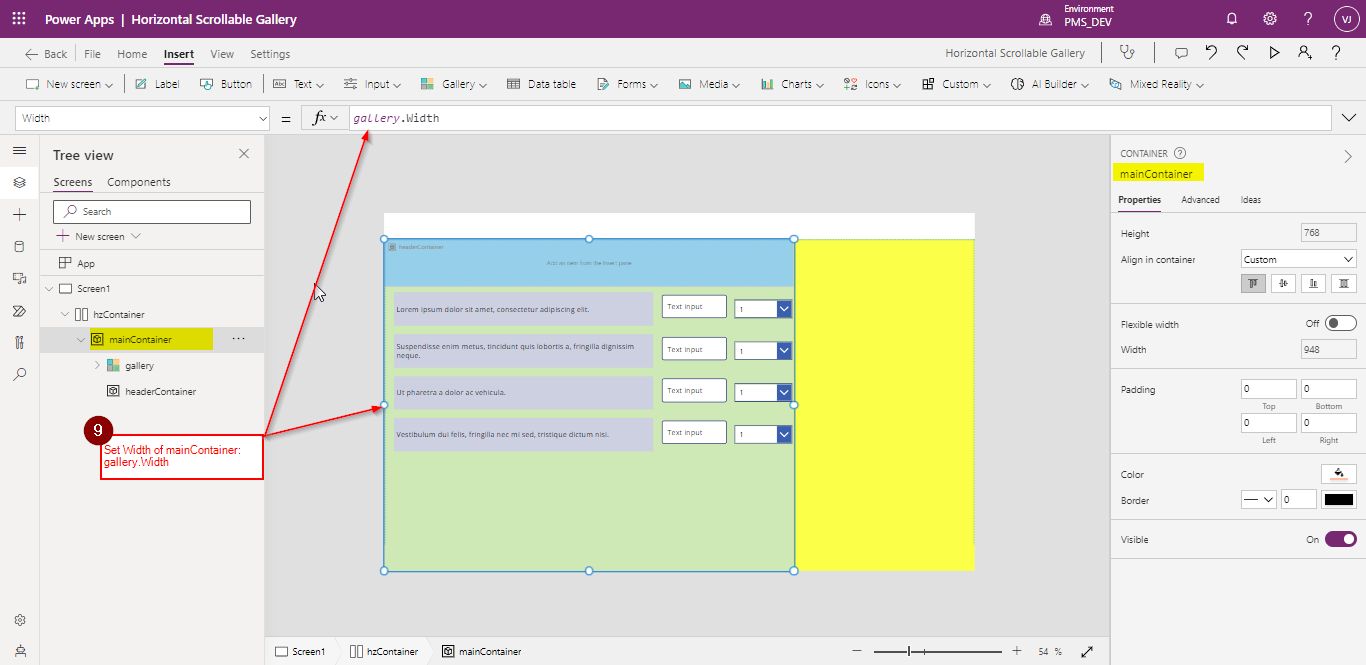
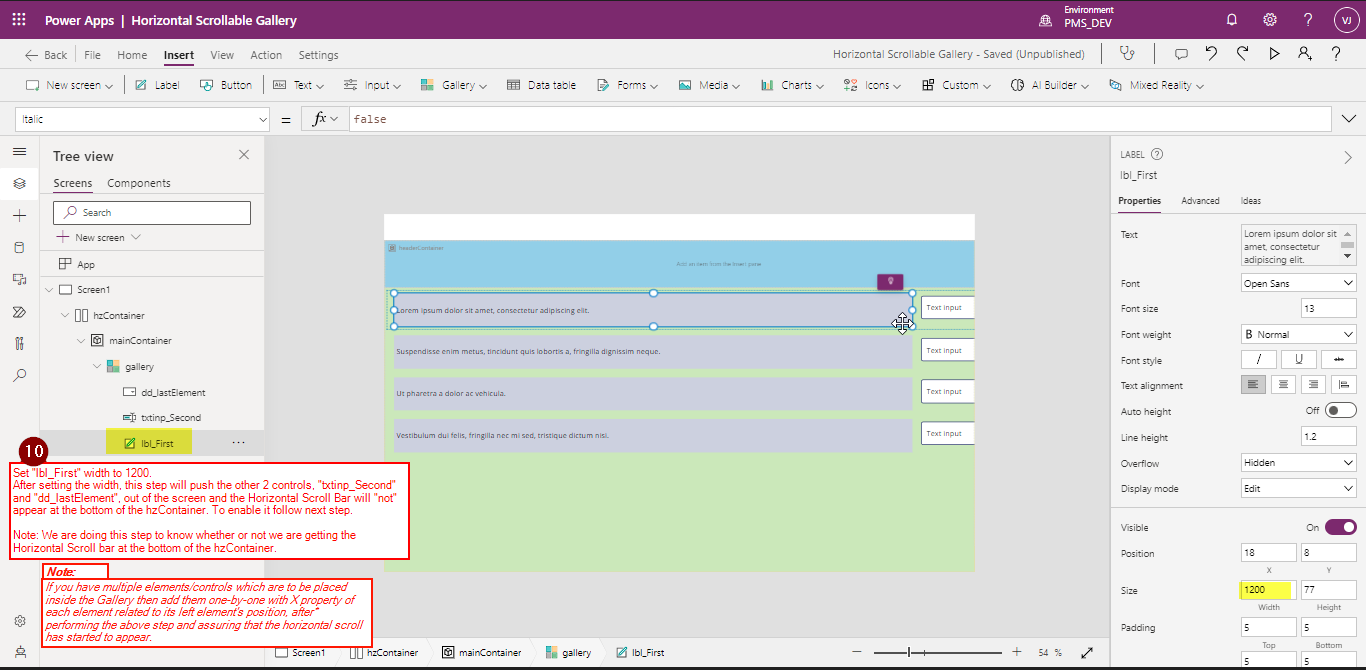
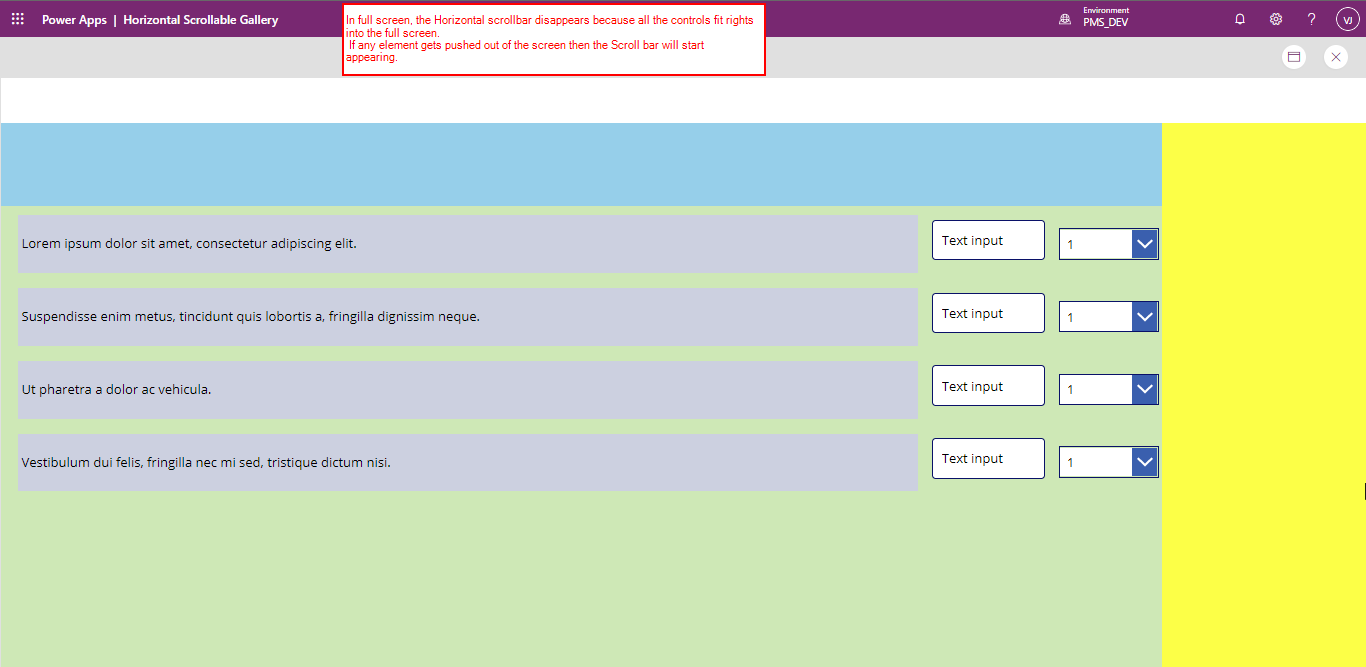
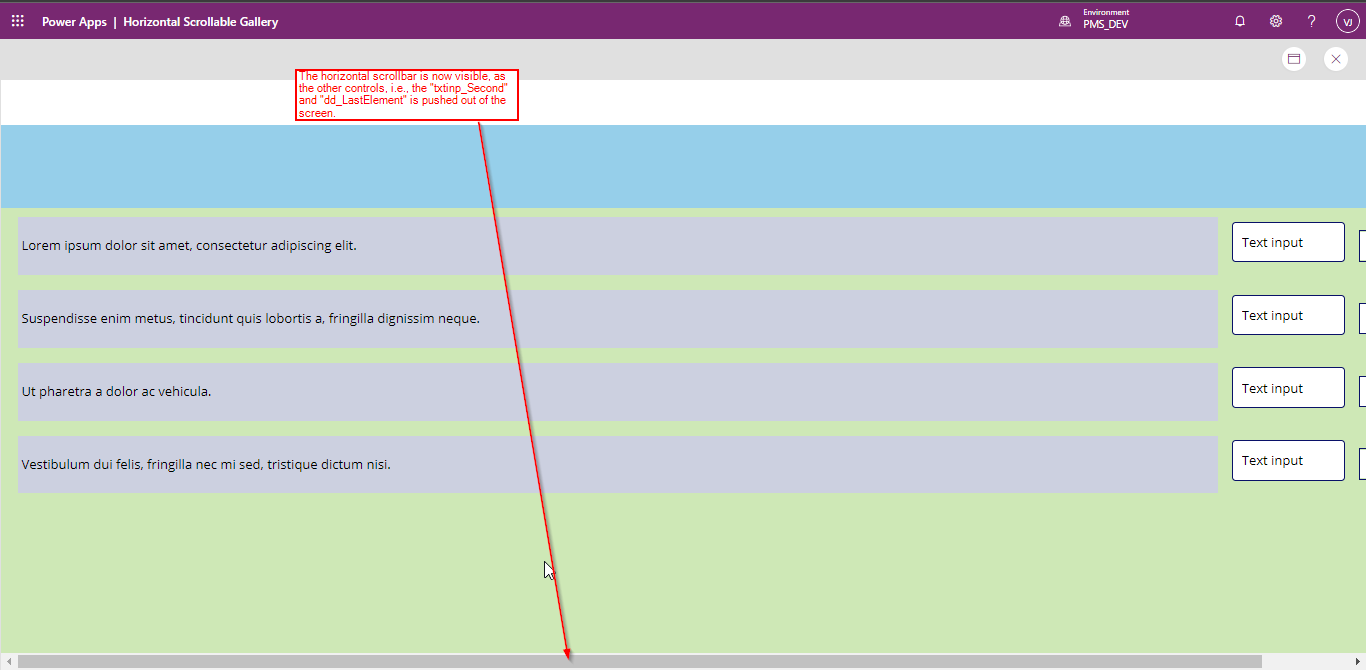
- Now, we will increase the width of the first element, “lbl_First” to 1200, which will in turn push the textinp_Second and dd_LastElement out of the screen and to view these controls, we need a Horizontal Scrollbar at the bottom of the screen, which will not currently appear on its own.
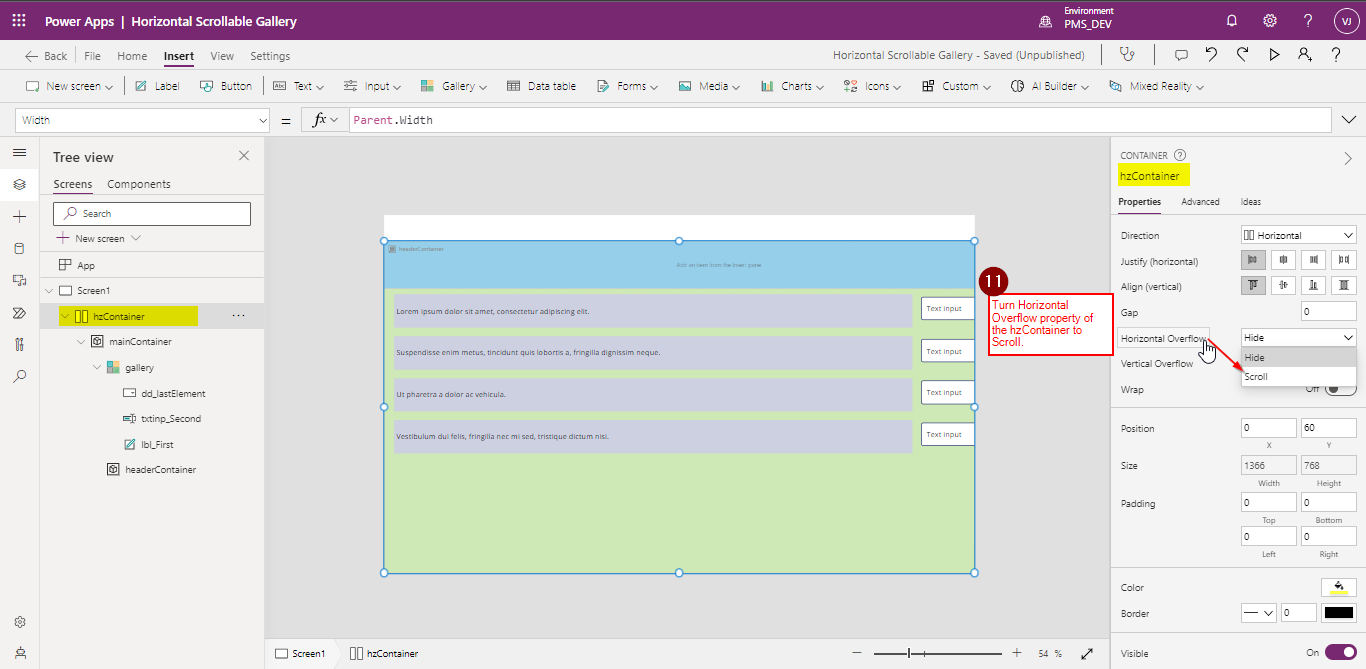
- To enable/view the Horizontal ScrollBar, turn Horizontal Overflow property of the hzContainer to “Scroll”.

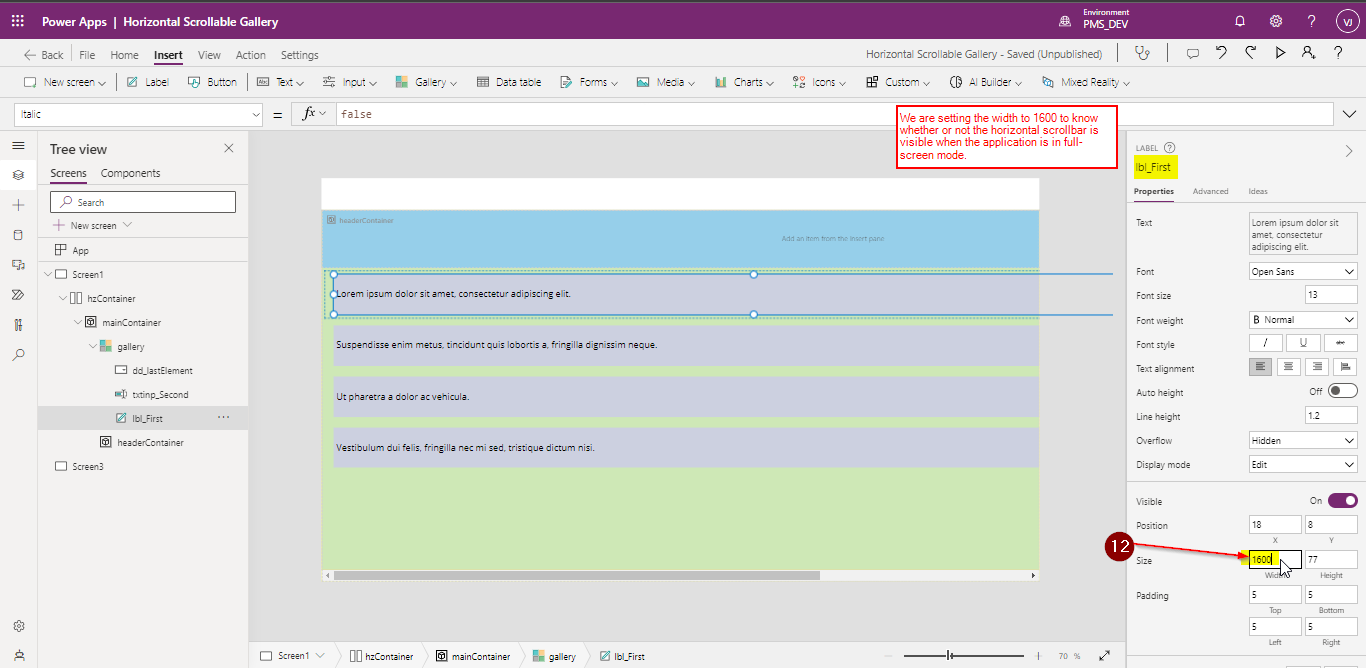
- Set the width of the lbl_First to 1600 to check whether or not the Horizontal scrollbar is visible in Full screen mode or not.
- Create Header Labels in the headerContainer as explained in the below shown image.
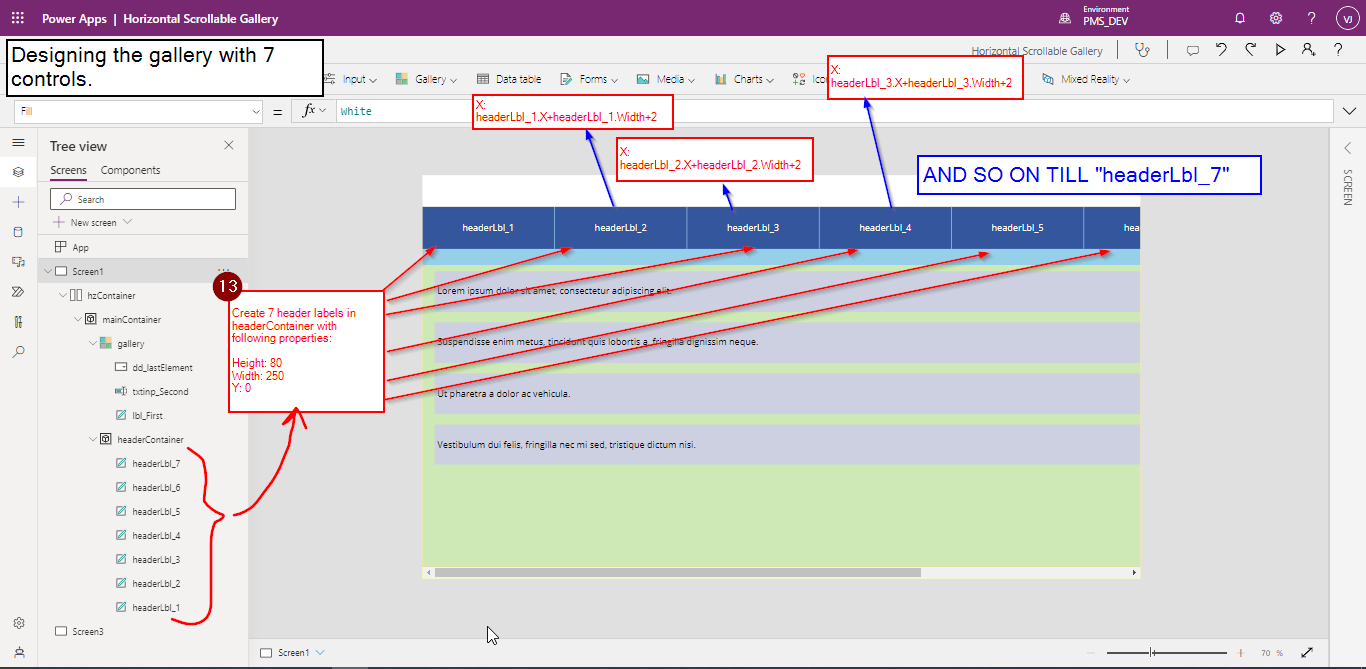
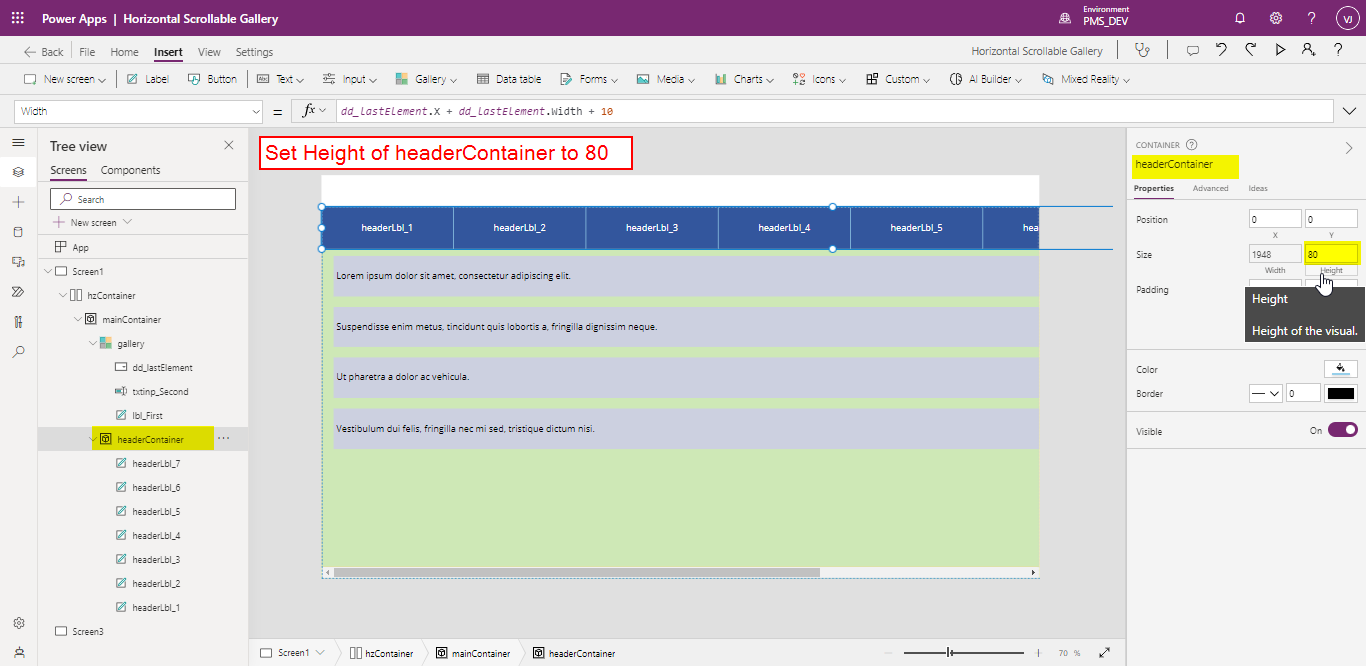
- Set Height of headerContainer to 80.
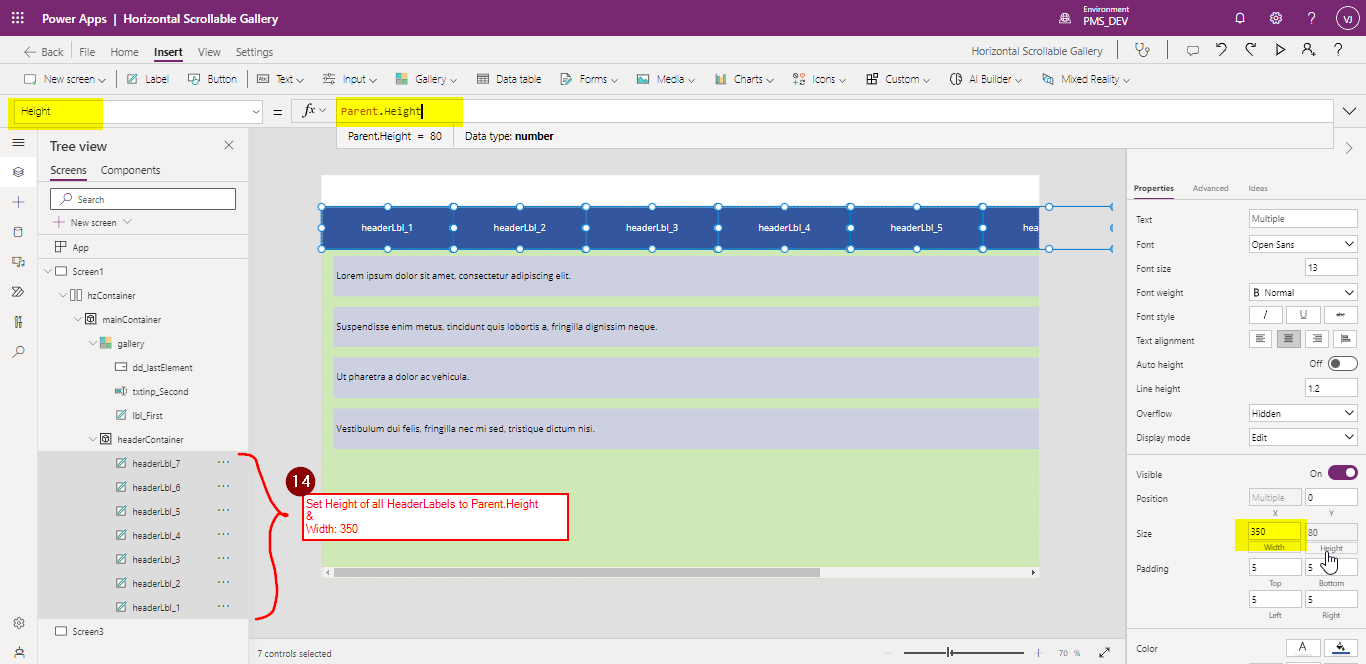
- Set Height of all HeaderLabels to Parent.Height as shown below:
Set Width of all HeaderLabels to 350.
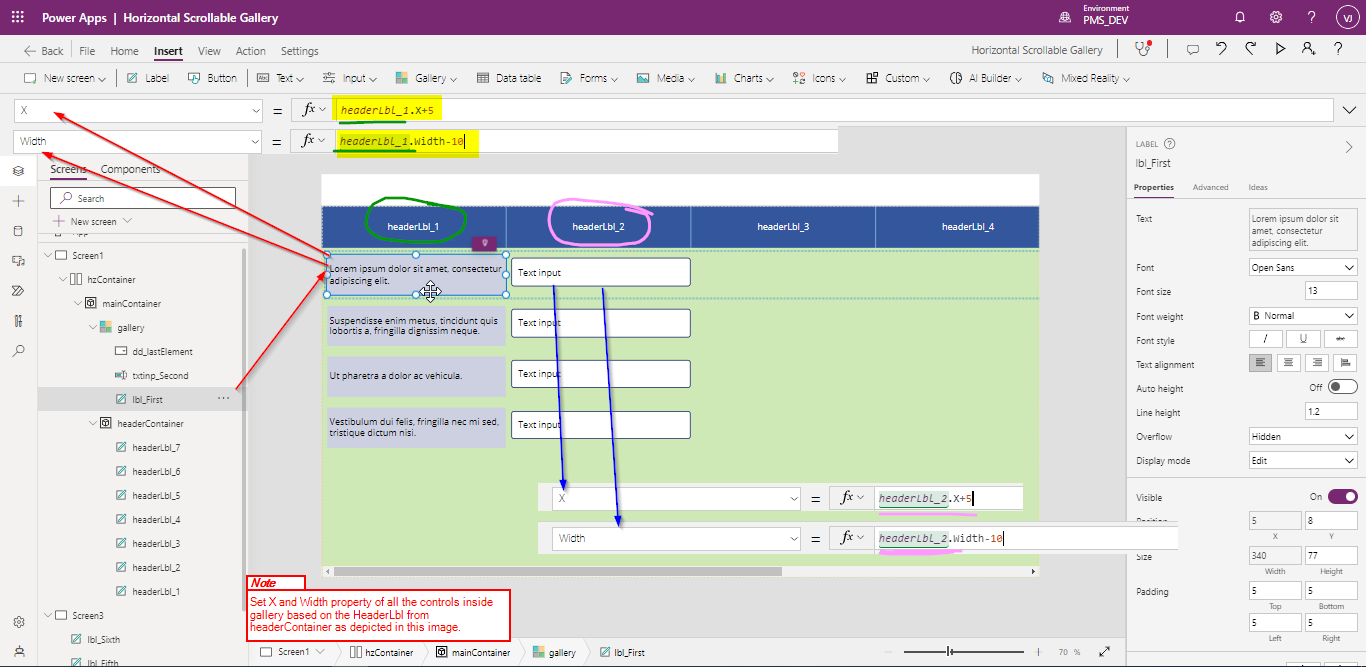
- Set X and Width property of all the controls inside gallery based on the HeaderLabel of the headerContainer.
- Added few other controls (here, labels; you can add any control) in gallery and set its property based on the HeaderLabel of the headerContainer.
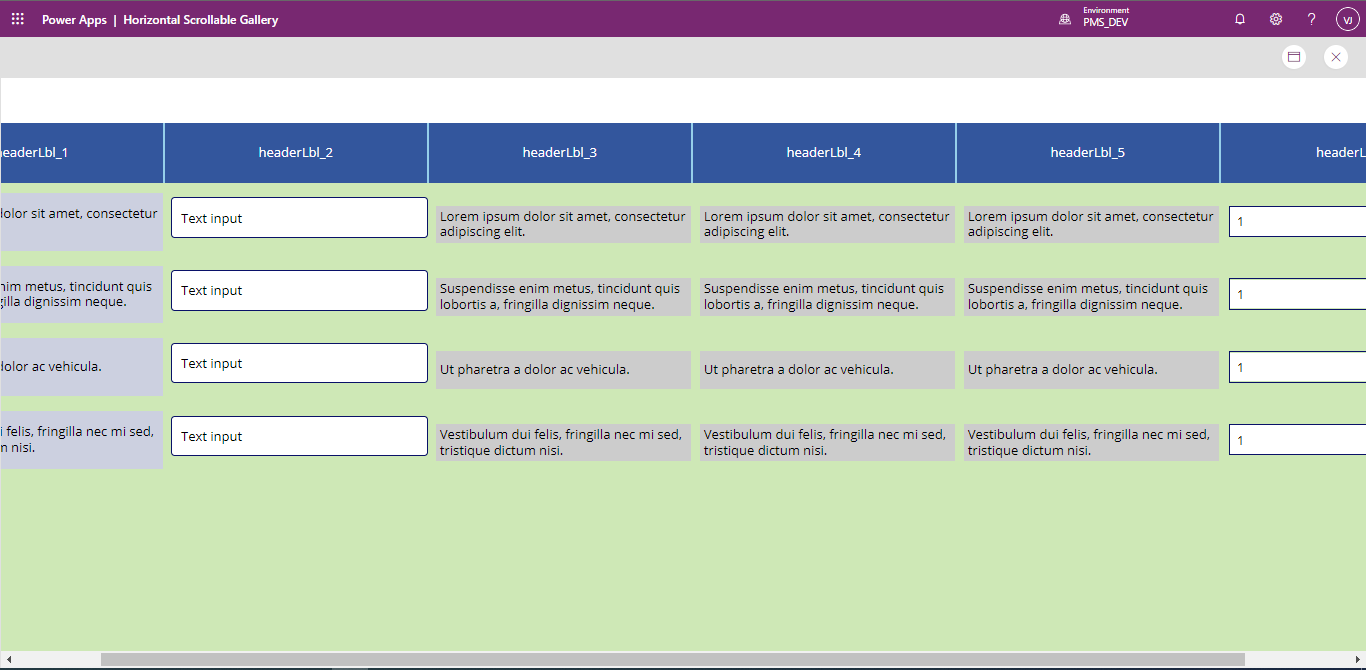
Using this method, you can create any number of columns inside the gallery and give its position based upon its respective Header Label, with the provision of both Horizontal Scrollbar and Vertical Scrollbar.
We can also help you with your Power BI needs. We provide consulting services for Power BI and can help your with your dashboards and reports.