Microsoft Power BI Consulting: How to get the data from the outlook attachment and load it to the Power BI report
In the dynamic realm of data analytics and Microsoft Power BI Consulting, incorporating Excel files into Microsoft Power BI reports is a common practice. Often, these files are received as email attachments in Outlook, requiring a manual download and integration process. While this approach is functional, it poses challenges when it comes to maintaining an up-to-date and efficient workflow, particularly when dealing with monthly data updates.
Challenges Faced:
The conventional method involves downloading each file locally before integrating it into the Microsoft Power BI report. This process, though effective, becomes cumbersome and time-consuming, especially when dealing with recurring monthly data updates. The need to repetitively download, integrate, and append data in Power Query can impede productivity and hinder the timely generation of insightful reports.
- Enhancing Workflow Efficiency: To address these challenges, it’s crucial to streamline the data integration process, ensuring a more efficient and time-saving workflow. Instead of manually downloading files every month, consider implementing a more automated and seamless solution.
- Automated Integration Approach: Implementing an automated approach involves leveraging Power Query’s capabilities to directly connect to email attachments without the need for manual downloads. By establishing a connection to your Outlook account within Microsoft Power BI, you can directly access and integrate the data from email attachments, eliminating the intermediary step of downloading files locally.
Benefits of Automated Integration:
- Time Savings: By bypassing the manual download step, the automated integration approach significantly reduces the time required to update Microsoft Power BI reports with new data.
- Real-time Updates: Stay on top of your data with real-time integration, ensuring that your reports reflect the latest information without any delay.
- Enhanced Productivity: The streamlined workflow allows you to focus on data analysis and report generation rather than spending time on routine data handling tasks.
Before starting the implementation, let us walk through some of the prerequisites for this implementation. However, we must keep in mind that we can also remove these prerequisites by applying some additional logic.
Prerequisites:
- Consistency in File Format: To streamline the integration process, it is imperative that the file format or schema remains consistent across all received files. This consistency not only simplifies the integration workflow but also ensures that the Microsoft Power BI report structure remains intact, facilitating smooth and error-free data importation.
- Uniform Email Subjects: In addition to standardized file formats, the subject line of the email containing the file attachments should also follow a consistent pattern. This practice contributes to the overall efficiency of the integration process by providing a clear and predictable identification mechanism for incoming data.
Now, let’s delve into the implementation details to achieve this seamless data integration.
Implementation:
Implementation steps includes:
- Establish a connection to your Outlook account within Microsoft Power BI.
- Configure Power Query to directly access email attachments with the required transformations like filtering, sorting, removing other columns, renaming columns etc.
- Set up a scheduled refresh on Microsoft Power BI service to get the latest data into the report.
Now, let’s walk through to the step-by-step process:
In Power Query, the Exchange.Contents() function provides a comprehensive table of contents from your Microsoft Exchange account. Upon inputting the necessary credentials, the function fetches data tables including Mail, Calendar, People, Tasks, and Meeting Requests. For our specific task of extracting data from email attachments, we exclusively focus on the Mail table. This functionality streamlines the process of accessing and utilizing attachment files within emails for enhanced data manipulation and analysis.
In this step, we will expand the Mail table to get the required data.
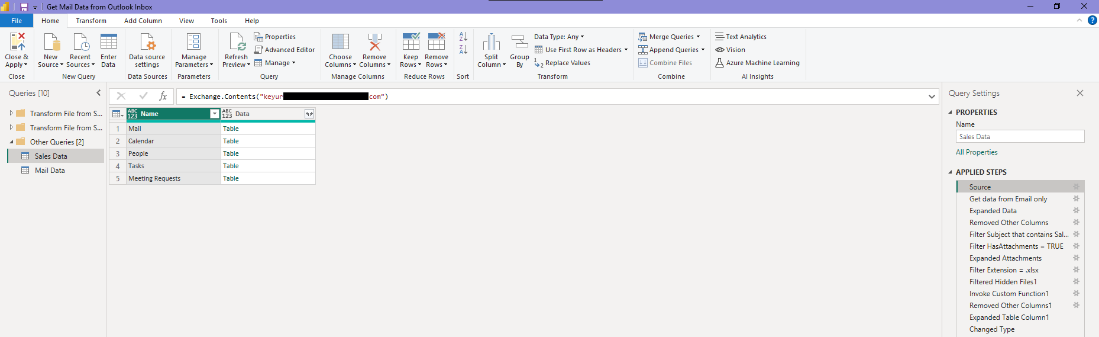
In this step, we will expand the Mail table to get the required data.

In the next step, we will expand the Mail table. After expanding the Mail table, we will get Name, Folder, Subject, Sender, HasAttachments, Attachments, and many other columns.
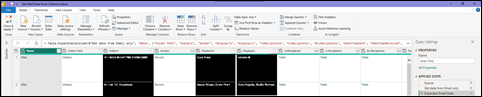
In the next step, we will remove other columns and keep only required columns like Subject, hasAttachments, and Attachments or you can only keep the required columns while expanding the table.
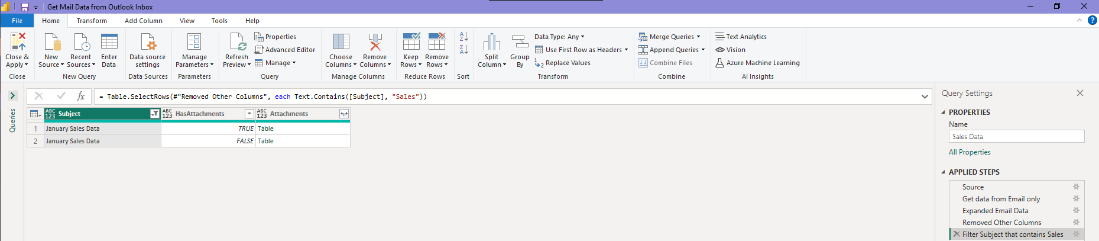
In this step, we will filter the Subject column such that it shows only the data that contains Sales word as our Subject will be uniformed like January Sales, February Sales, etc. as discussed in the prerequisites.
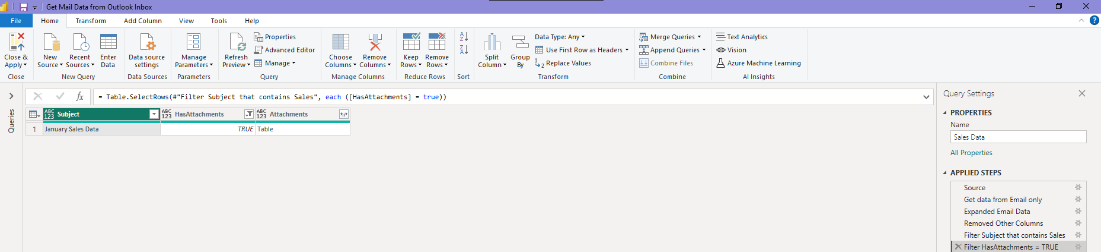
In the next step, we will filter the HasAttachments column to TRUE as we need the data only from the attachments and expand the table.
Quick Tip: We can also sort the data in descending order based on the DateTimeReceived column and then remove the duplicates from the Subject Column. So, if there are 2 files for the same month, we will only have the latest data in the report.
Discover the power of our services:
Microsoft Fabric, Microsoft Power BI Consulting, Microsoft Business Intelligence, Microsoft SQL Server, and Dynamics 365 Business Central. By the power of these services, from advanced analytics to seamless business integration, we’ve got the expertise you need to optimize operations and drive growth. Harness the potential of your data infrastructure with our comprehensive suite of solutions.
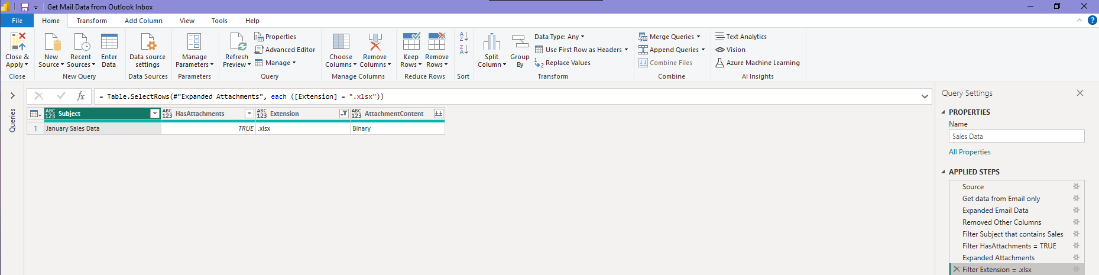
As we can see in the above screenshot, we have 2 different Extensions. As we need the data from the Excel file only, we will apply the filter on the Extension column and keep the data with the .xlsx extension only. This will help us to prevent the query from breaking in case any other attachments like images, text files, etc. are there.
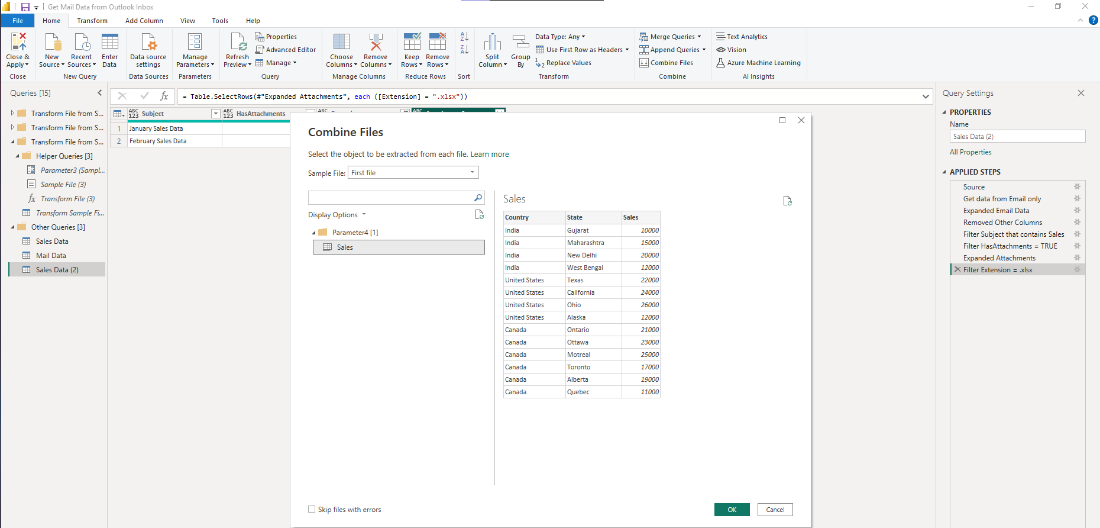
Now at this step, we just need to expand the AttachmentContent column and Power Query will automatically expand the data and it will ask to select the data for the first time only. Once you complete these steps, next time onwards, we just need to refresh the data and the data for the next month will be automatically loaded to the Microsoft Power BI report.
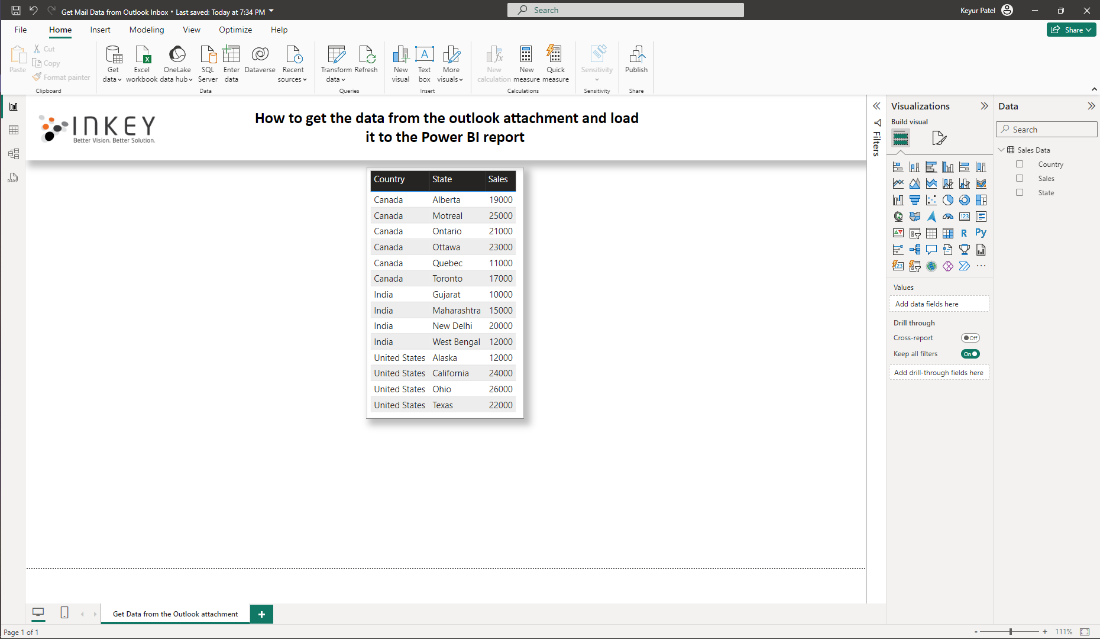
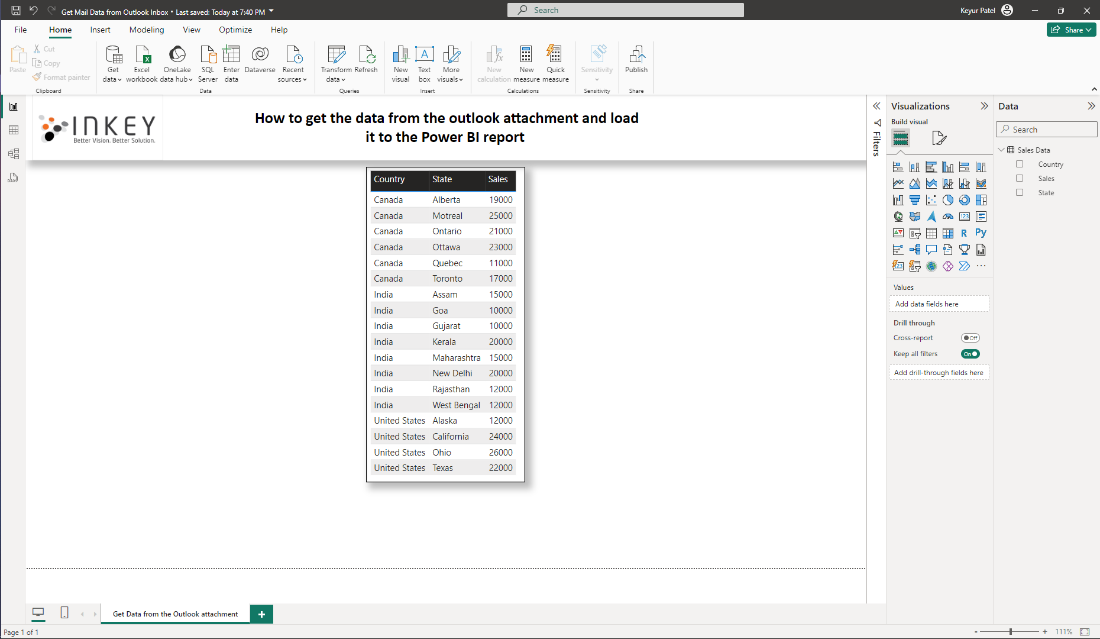
Now let’s look at the table visual we have on the Microsoft Power BI desktop after clicking on the Close & Apply button in the Power Query.
Now if we want to get the data from next month’s email attachment, we just need to refresh the report and the new data will be loaded in the report.
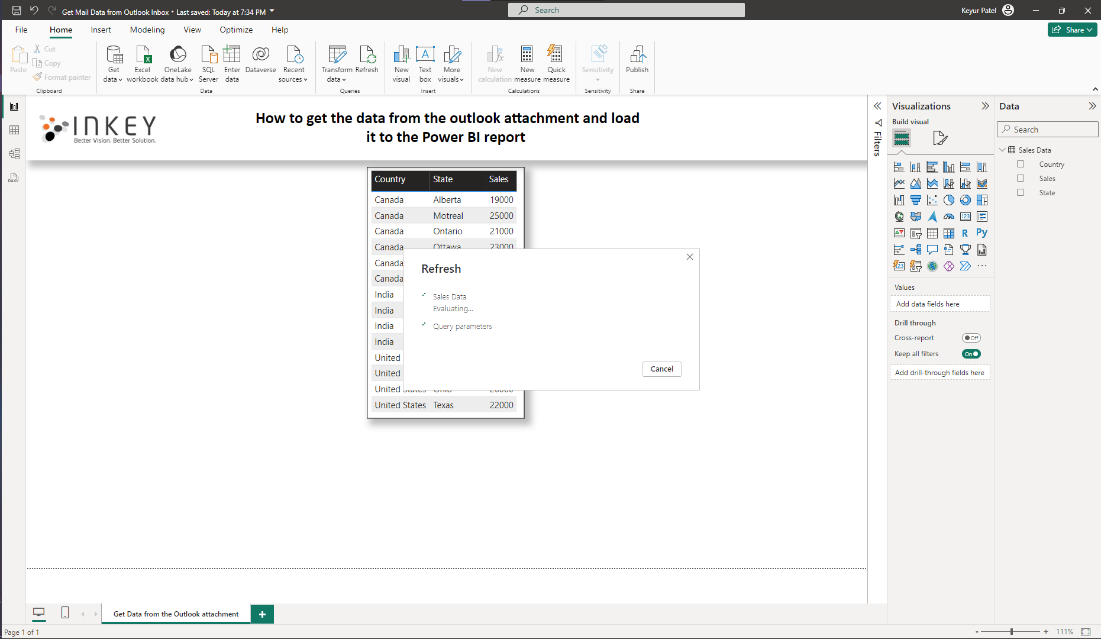
As per the above screenshot, we can see that the new rows for India have been added to the report.
Conclusion:
This feature enables the automation of importing attachment data directly into Microsoft Power BI or Excel, offering a streamlined and efficient process. Leveraging the transformative capabilities of Power Query, users can apply sophisticated filters across essential fields and effortlessly expand attachments into a structured table. This fully automated solution ensures that each time an email with attachments is received, the data is seamlessly integrated into the output.
We can always add our additional logic to prevent the query/solution from breaking due to inconsistent file format or other issues with Microsoft Power BI Consulting.
Know the number of records in any Dataverse entity or table.
https://inkeysolutions.com/entity-record-counter
ATM Inspection PowerApp to ease ATM inspection and report generation process.
https://inkeysolutions.com/microsoft-power-platform/power-app/atm-inspection
Insert data into Many-to-Many relationship in Dynamics CRM very easily & quickly, using the Drag and drop listbox.
http://inkeysolutions.com/what-we-do/dynamicscrmaddons/drag-and-drop-listbox
Comply your Lead, Contact, and User entities of D365 CRM with GDPR compliance using the GDPR add-on.
https://inkeysolutions.com/microsoft-dynamics-365/dynamicscrmaddons/gdpr
Create a personal / system view in Dynamics CRM with all the fields on the form/s which you select for a particular entity using the View Creator.
http://inkeysolutions.com/what-we-do/dynamicscrmaddons/view-creator