
In our previous blog, we delved into the inner workings of Deployment Pipelines. Now, we shift our focus towards a crucial aspect of Power BI development – integrating Git with workspaces in Power BI Service, especially those that play a pivotal role in your Deployment Pipelines.
Our journey now leads us to explore the seamless integration of Git with Power BI workspaces. This integration brings powerful version control capabilities and collaboration opportunities for your development team. To get started, follow these essential steps:
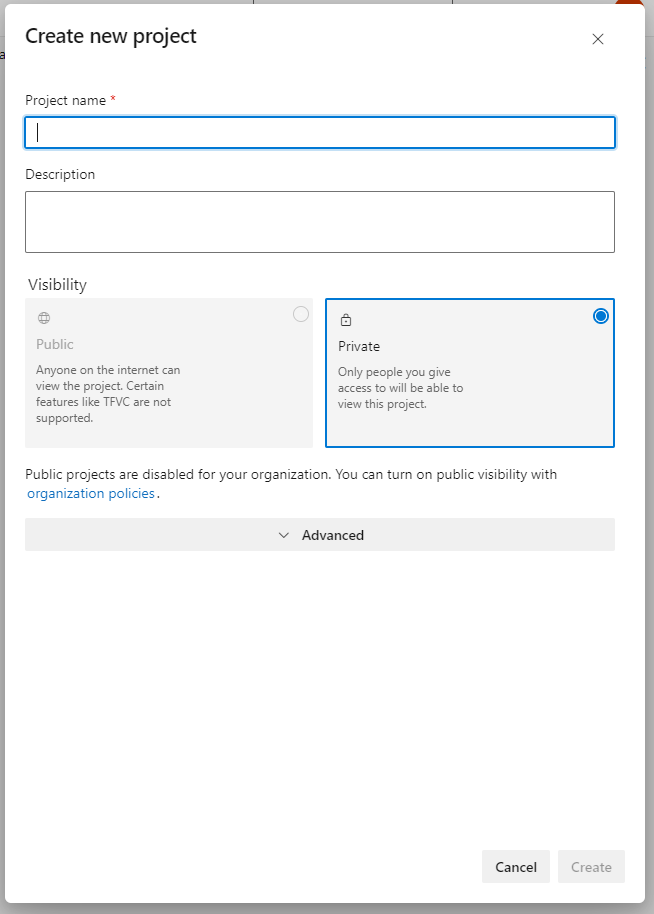
Create a Project on Azure DevOps: Within Azure DevOps, create a dedicated project. This project will provide an organized space for managing your Power BI projects, Git repositories, and related resources.
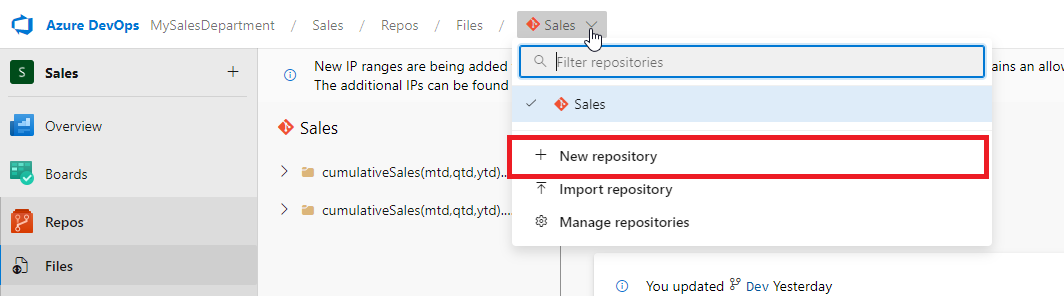
Create a Remote Repository on Azure DevOps: The first step in integrating Git with Power BI workspaces is to establish a remote repository on Azure DevOps. This repository will serve as the secure vault for your Power BI projects, ensuring version control and collaboration.
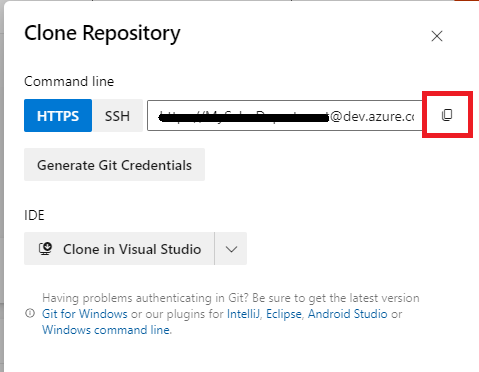
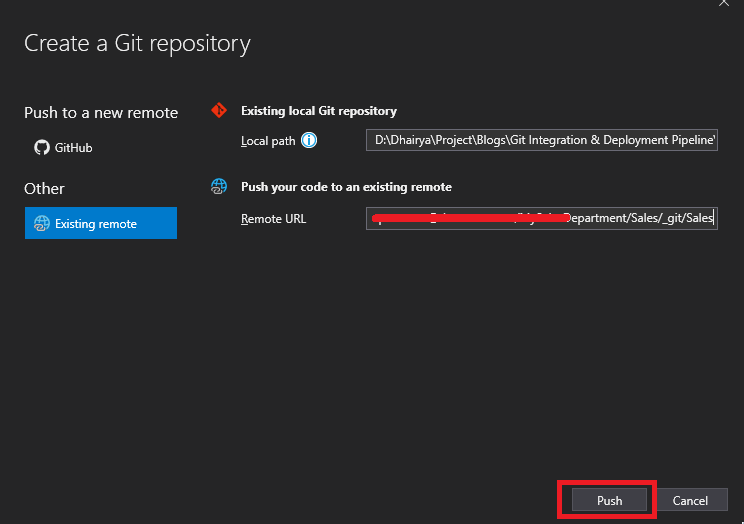
Configure Local Repository with Remote Repository: Establish a connection between your local repository and the remote repository on Azure DevOps. This configuration ensures that your local changes are synchronized with the remote repository, maintaining consistency across your development workflow. Copy the HTTPS url of the remote repository and paste it into Visual Studio pop-up for connecting the local repository with the remote.
Set Up Three Branches on the Remote Repository: Effective Git usage relies on branches. Create three branches on the remote repository: “Dev,” “UAT,” and “PROD.” These branches serve distinct purposes in your project development and deployment process.
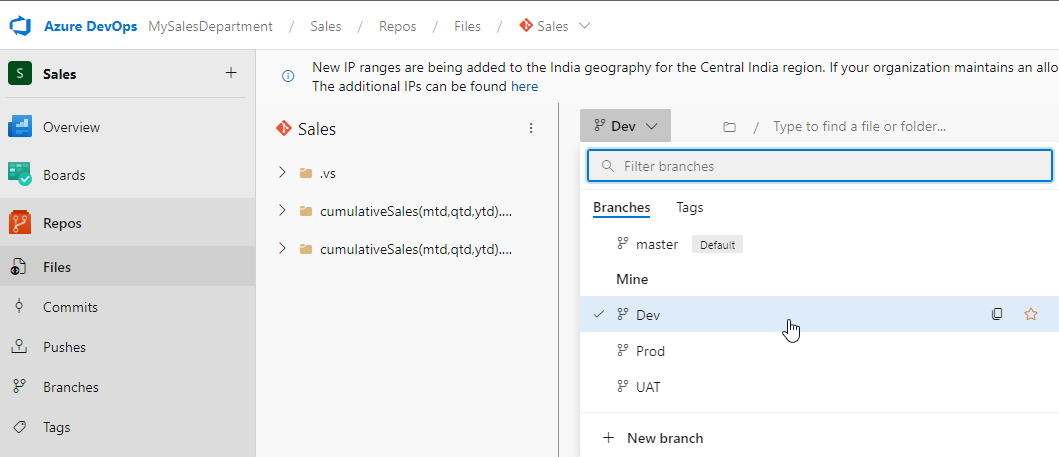
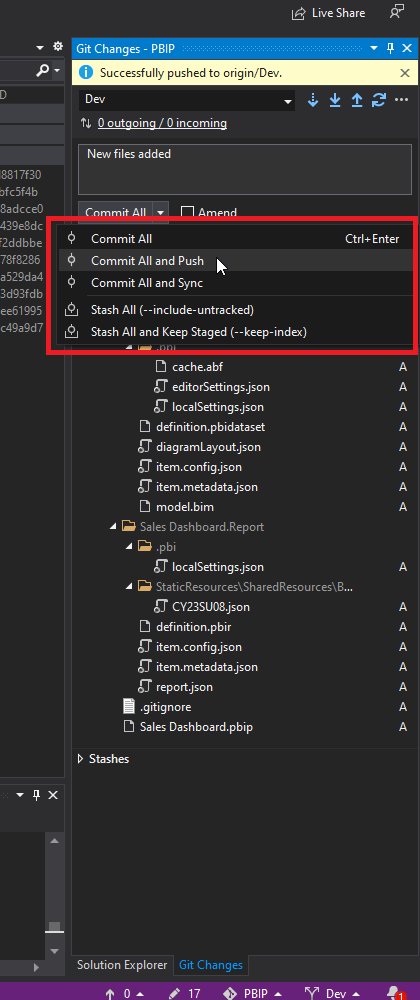
Push Local Content to the “Dev” Branch: The “Dev” branch will be your primary workspace for developing and testing Power BI content. Push your local content to this branch, effectively storing your Power BI projects there.
The integration process isn’t complete until you link your Power BI workspaces with their respective Git branches. Follow these steps to achieve this crucial connection:
Access Your “Dev” Workspace: Navigate to your “Dev” workspace within Power BI Service. To do this, click on “Workspace Settings” from the navigation bar, taking you to the workspace’s configuration options.

Choose the “Git Integration” Option: In the workspace settings, select the “Git Integration” option from the left menu. This choice enables the link between your Power BI workspace and the Git repository.
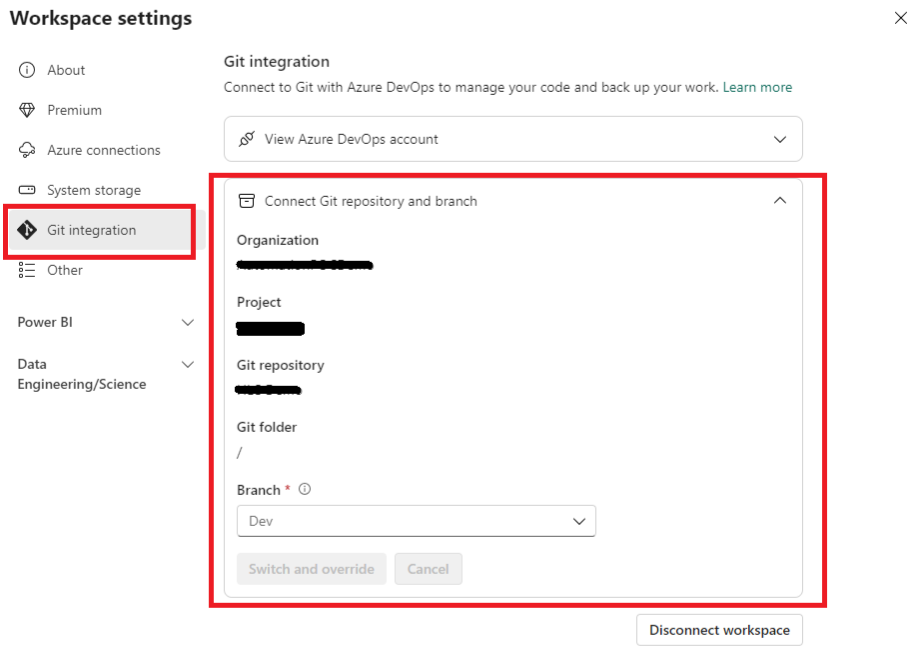
Fill in the Details: Provide the necessary information, including your Azure DevOps Organization, Project, and Git repository. For this workspace, select the “Dev” branch of the Azure repository, ensuring alignment with your development branch.
Repeat for “UAT” and “PROD” Workspaces: To ensure a holistic Git integration, replicate these steps for your “UAT” and “PROD” workspaces, linking each to their respective Git branches.
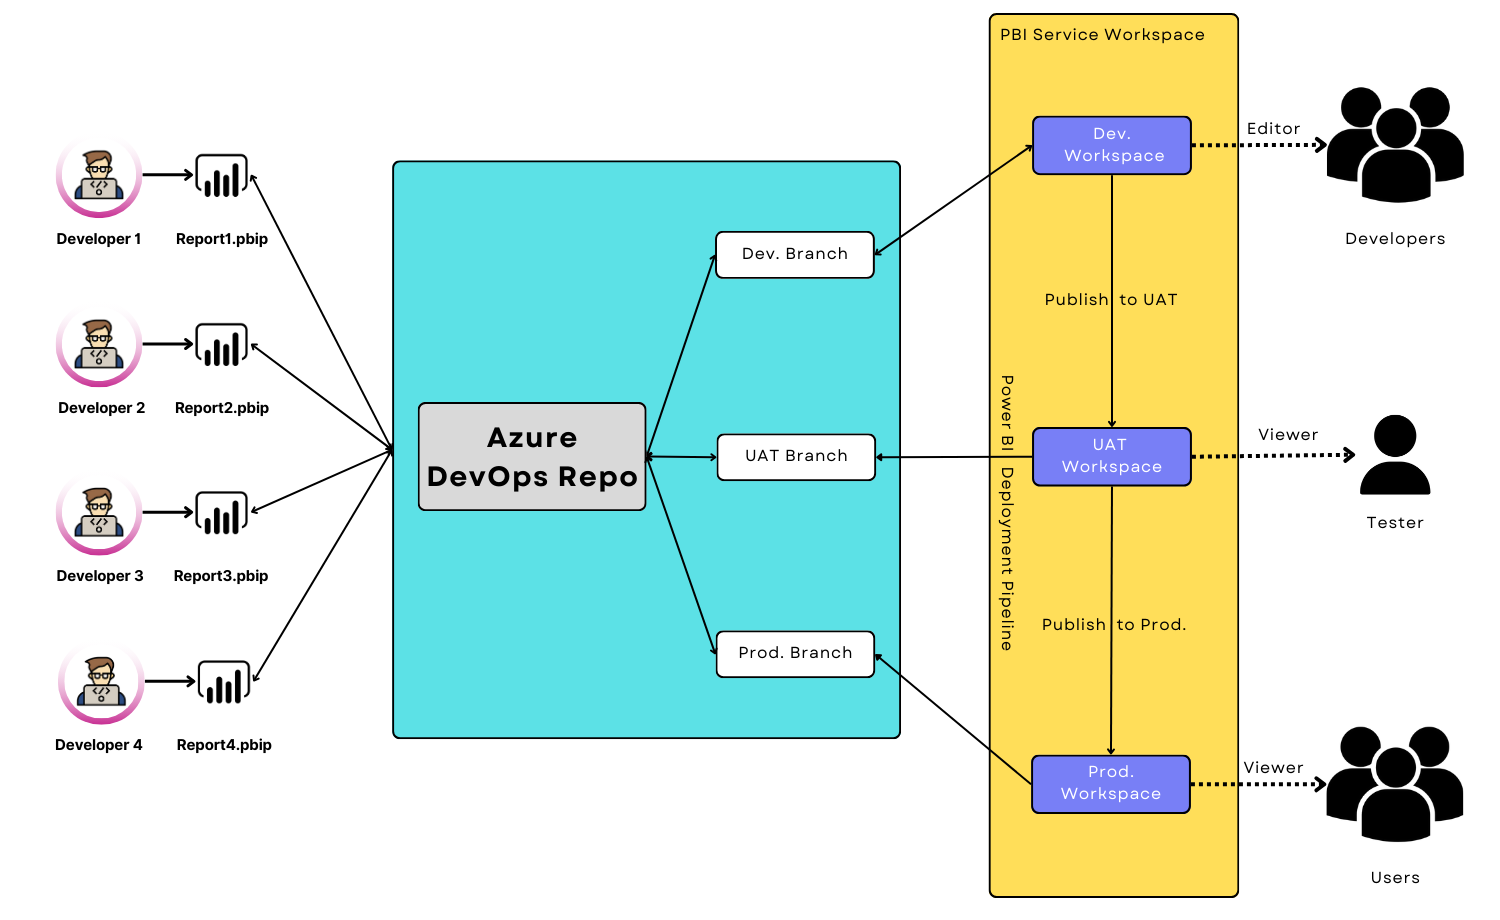
With these comprehensive steps, you’ve successfully implemented a robust architecture for managing Power BI content within Deployment Pipelines. The integration of Git introduces powerful version control capabilities and collaboration opportunities, enhancing your team’s productivity and streamlining your development workflow. Your Power BI projects are now equipped to thrive in an efficient and collaborative environment.
Now our whole architecture will look like below illustration.
Know the number of records in any Dataverse entity or table.
https://www.inkeysolutions.com/entity-record-counter
ATM Inspection PowerApp to ease ATM inspection and report generation process.
https://www.inkeysolutions.com/microsoft-power-platform/power-app/atm-inspection
Insert data into Many-to-Many relationship in Dynamics CRM very easily & quickly, using the Drag and drop listbox.
http://www.inkeysolutions.com/what-we-do/dynamicscrmaddons/drag-and-drop-listbox
Comply your Lead, Contact, and User entities of D365 CRM with GDPR compliance using the GDPR add-on.
https://www.inkeysolutions.com/microsoft-dynamics-365/dynamicscrmaddons/gdpr
Create a personal / system view in Dynamics CRM with all the fields on the form/s which you select for a particular entity using the View Creator.
http://www.inkeysolutions.com/what-we-do/dynamicscrmaddons/view-creator
INKEY is your solution partner.
Our focus is to deliver you in-time intelligent innovative solutions ("key") for the problems in hand. Maintaining a quality standard right from the inception of a project is our top most priority.
Our team of talented professionals will execute your projects with dedication and excellence. We take ownership and accountability for the effort that goes into meeting our client’s needs.
Years of experience and proven success of delivering innovative custom solutions.


© All Rights Reserved. Inkey IT Solutions Pvt. Ltd. 2024


Leave a Reply